As an element of interior decoration, a plasterboard arch is often used. There are several reasons for this. This and smoothing the corners of the structure, and the liberation of the space of rooms, due to the removal of doors, and just the beautiful appearance of the arch.
One of the materials that can help make an arch is gypsum board. Due to its plasticity, drywall sheets bend well, and the technology of connecting profiles for drywall structures allows you to make arches of any radius and shape. Further, I will show you three methods of how to make an arch from gypsum board, using standard technologies, without “homemade products”.
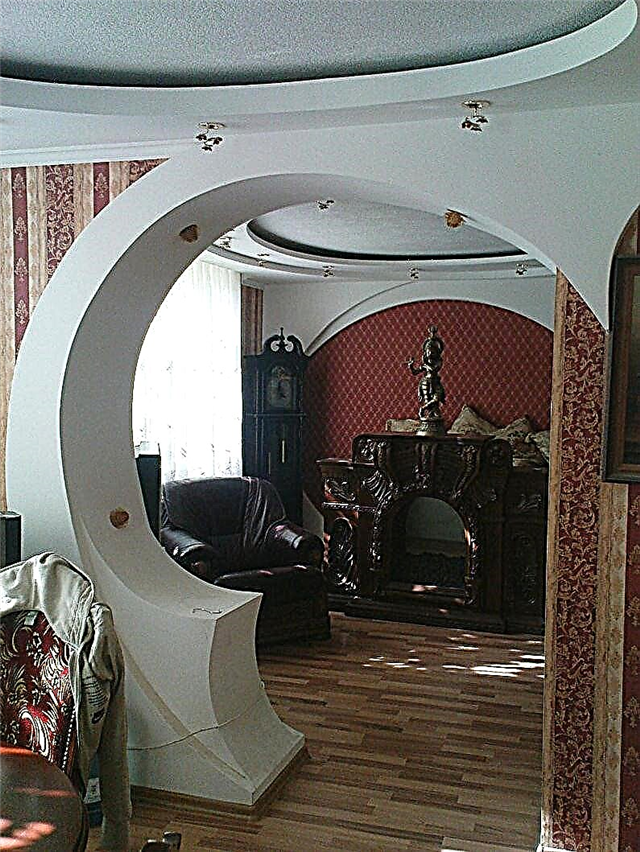
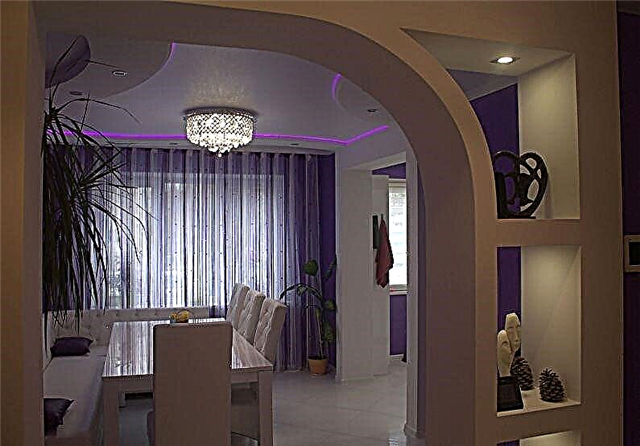
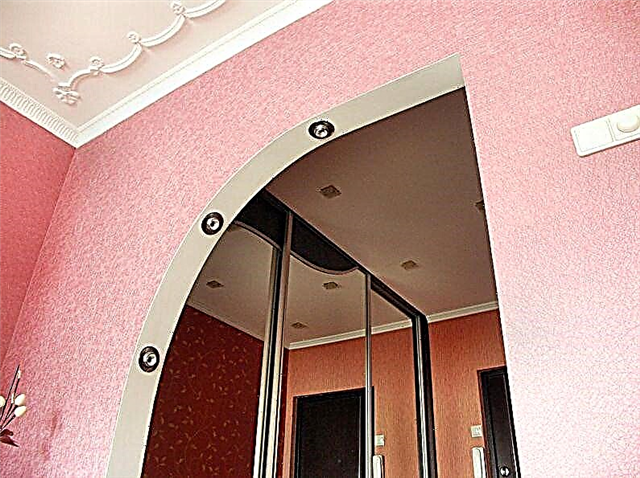
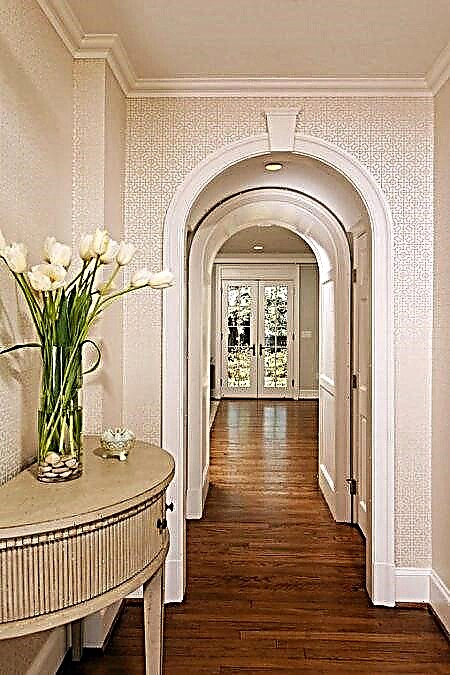
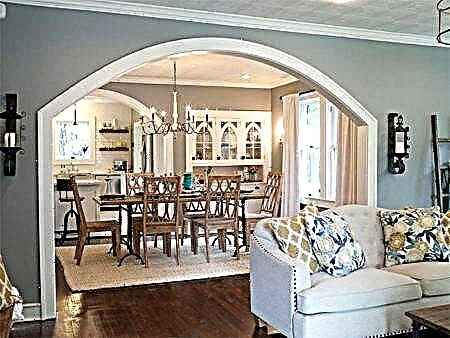
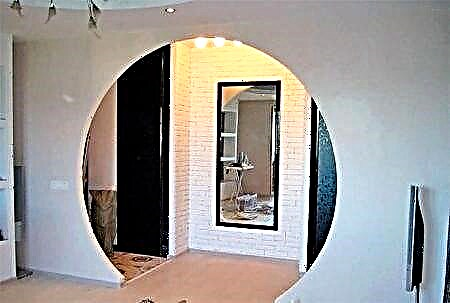
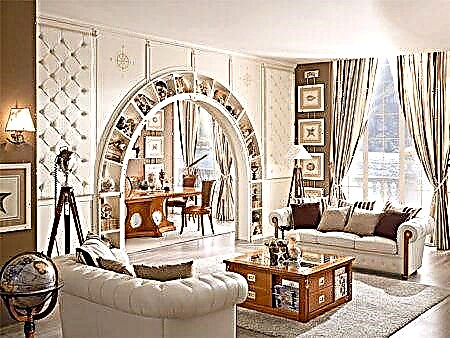
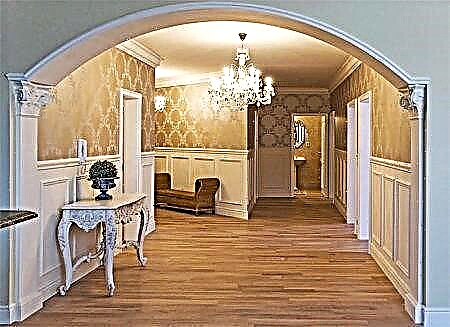
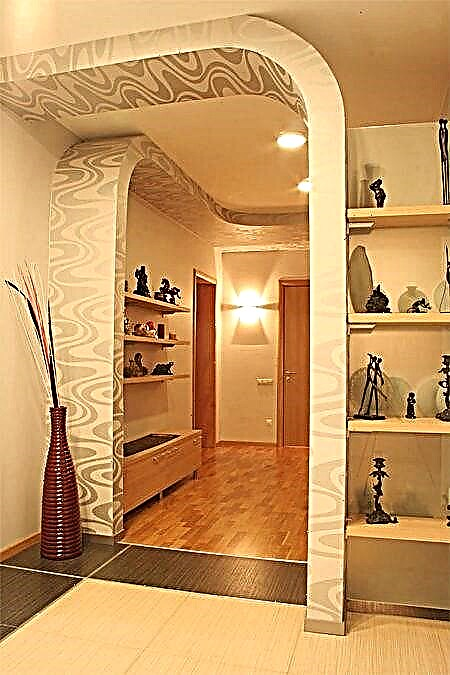
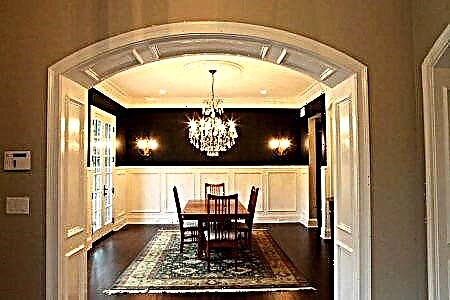
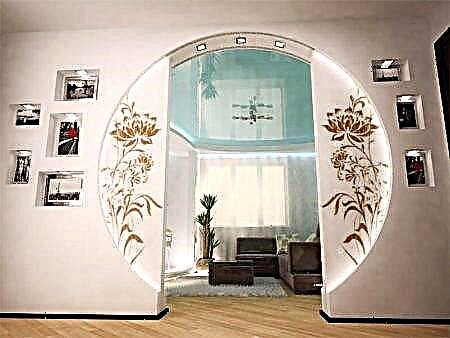
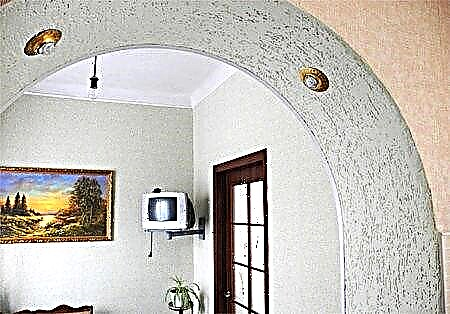
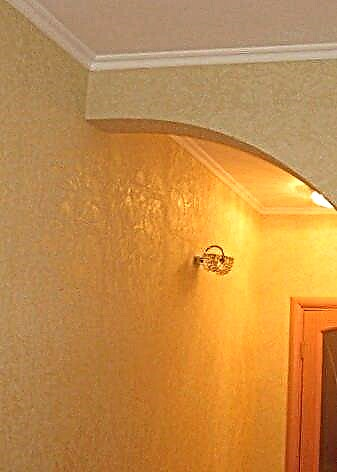
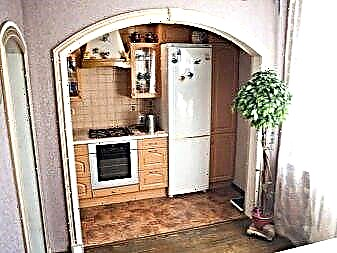
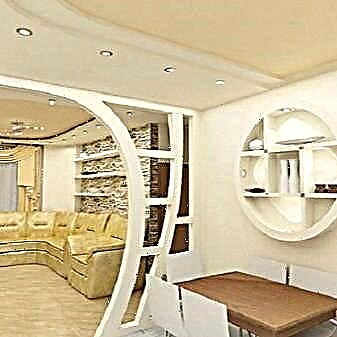
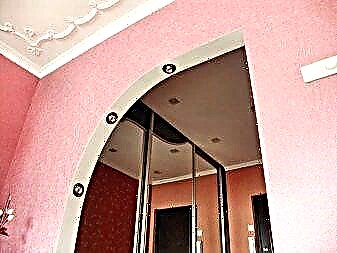
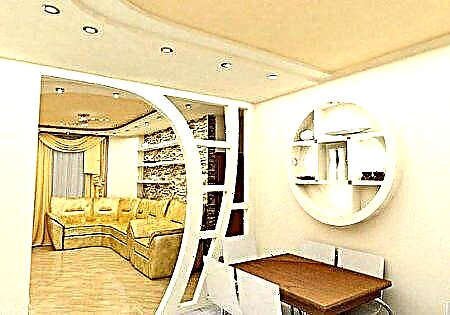
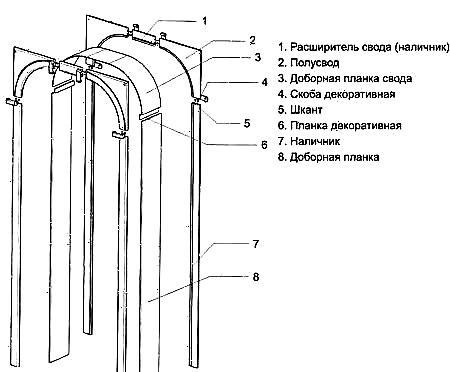
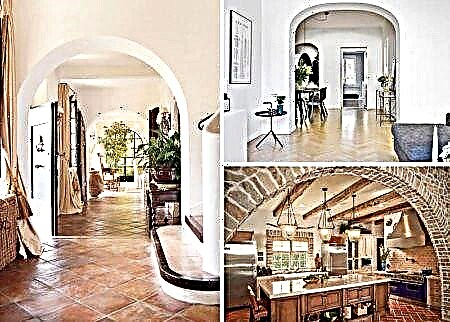
To start productive work, look at the photo.
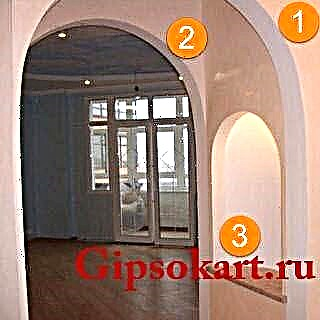
It is characterized by the use of the concept of drywall arch in three designs at once:
- Double-sided arch in the doorway (1),
- One-way arch in the doorway (2),
- Narrow arch in a niche (3).
Material for gypsum board arches
The following material is used for arches and arched structures made of drywall:
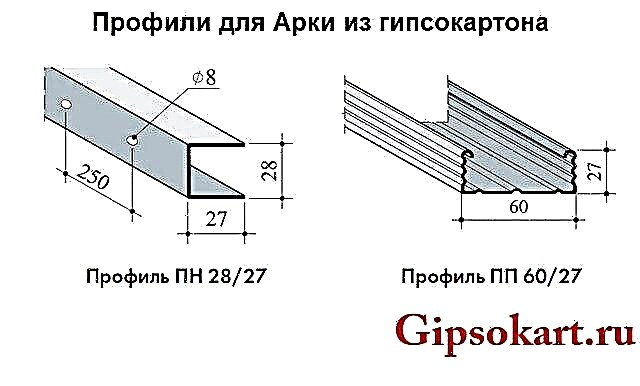
- Profile ceiling software 60/27,
- The profile directing PN 28/27,
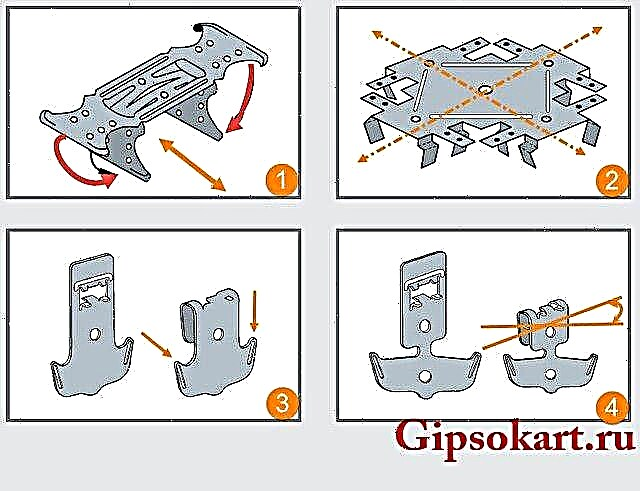
- Two-level fastenings for profiles (1,2),
- Suspension mounts (3.4).
Arch radius
The most complex element of the arch is a curved surface. It is necessary to bend not only the sheet of gypsocraton, but also to make a curvilinear frame. About the frame, a little lower, here is about the radius of bending of drywall.
There are two ways to bend drywall: dry and wet methods (read a separate article: How to bend drywall)
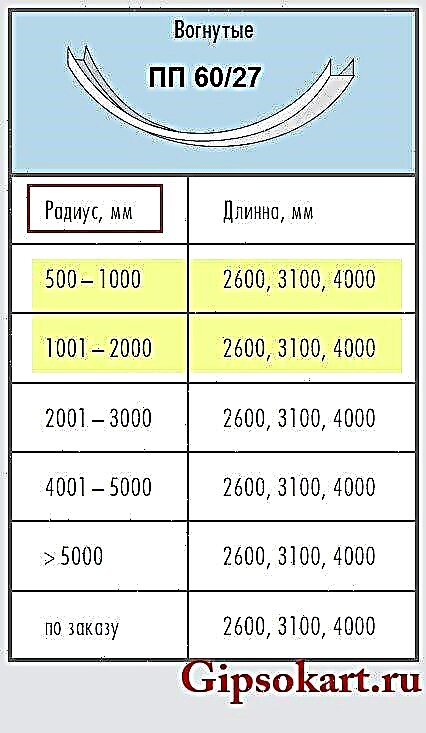
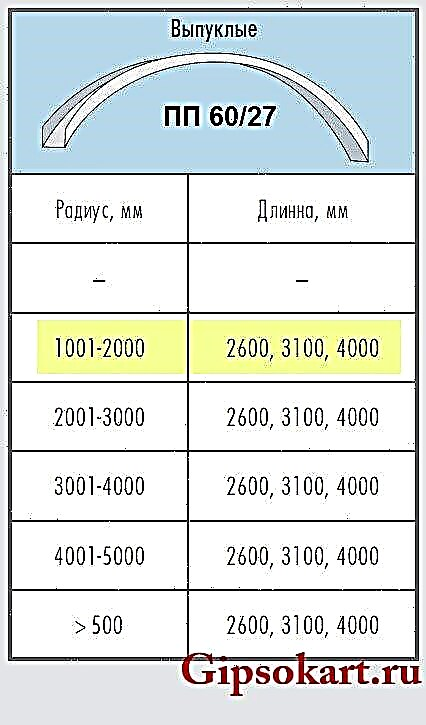
The radius by which the drywall can be bent in a dry way depends on the thickness of the sheet. Thicker drywall sheet, longer radius. In the table we see these radii.
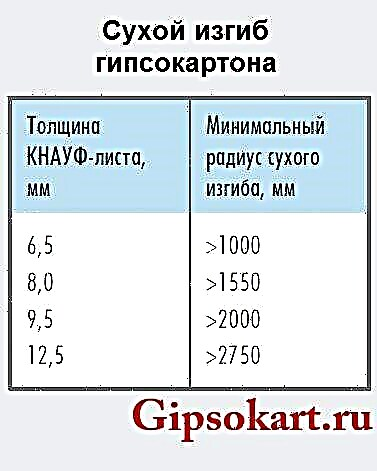
As you can see, the minimum dry bend radius of drywall is 1000 mm, for this you need a sheet with a thickness of 6.5 mm. This means that drywall bent drywall can only be used
- for vaulted ceiling,
- for arched plasterboard ceiling,
- for a wide arched niche,
- for an arch in a doorway wider than 1200 mm.
To make an arch in the door up to 900 mm and an arch in the opening 300 - 500 mm, or an arch in a narrow niche of 100 - 400 mm will fail.
Plasterboard arches with a diameter of 300 - 500 mm
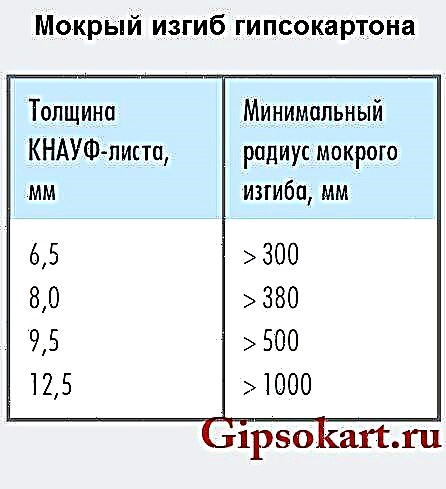
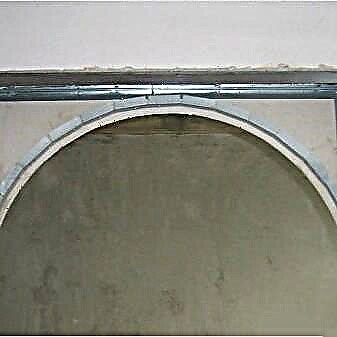
To create narrow arches and arches in narrow openings and niches, wet bending technology is used. As you can see from the table, the minimum radius of the arch, and it depends on the minimum bending radius of the drywall sheet, is 300 mm. This allows you to make such an arch design.
In the photo we see a diagram of the device arch 300-500 mm in a single drywall construction.
However, this design is easily transported into a narrow opening, up to 500 mm wide.
Drywall arch with a bending radius of 500 mm
Details about such an arch, I told in the article "How to make an arched ceiling", here briefly.
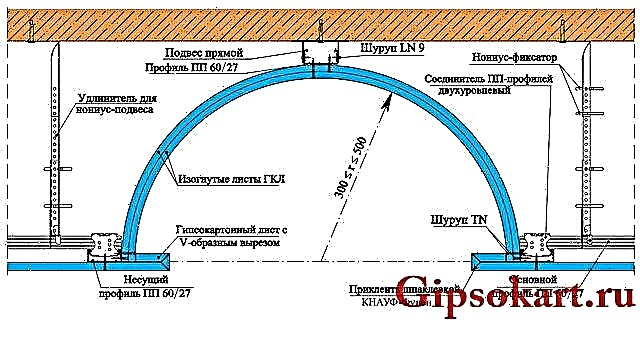
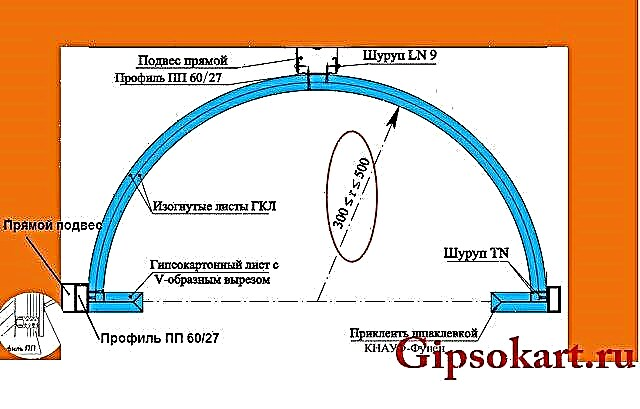
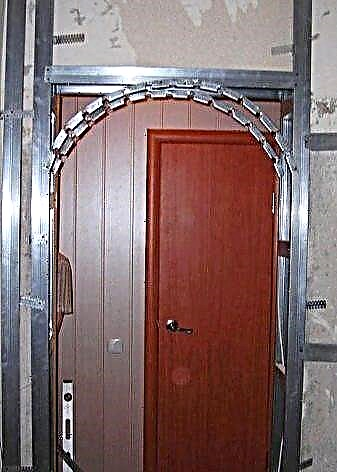
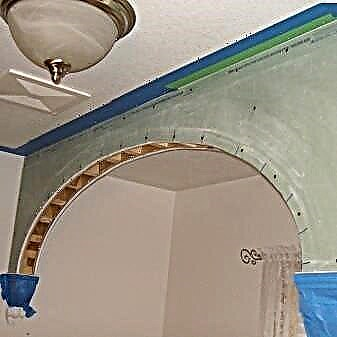
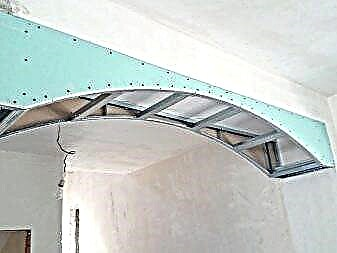
The design of the arch with a bending radius of 500 mm is done in a standard doorway, 600-1200 mm. The design of the arch is shown in the figure.

As you can see, the “drawback” of this design is the lack of standard bent profiles. They are produced by the manufacturer, even in two versions: bent inward and bent outward. However, they can be replaced.
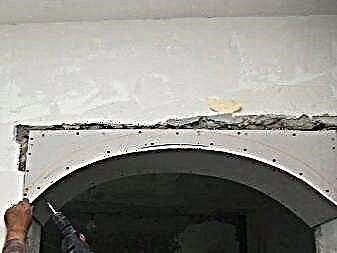
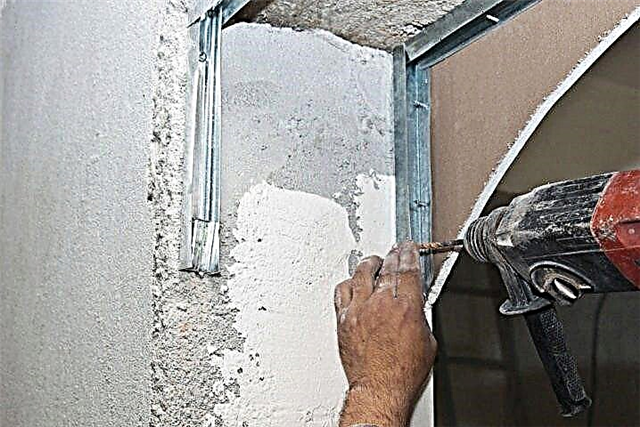
To bend the profile yourself, cuts are made in the shelves of the PP 60/27 profile, thanks to which the profile can be bent to the desired diameter.
To fix a bent profile, you can, not only, as shown in the figure above, you can do this: 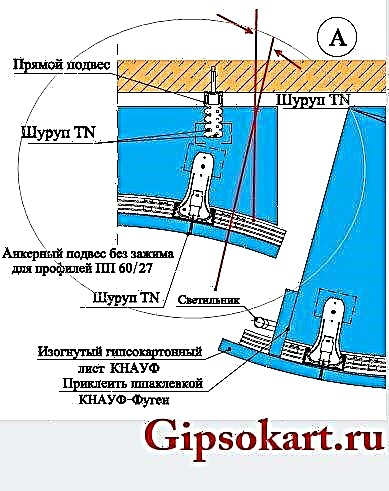
The fastener design involves: a direct suspension, an anchor clamp, and two PP 60/27 profiles, one of which is bent. Please note that the fastening of the bent profile to the direct suspension is made with TN screws with offset perforation.
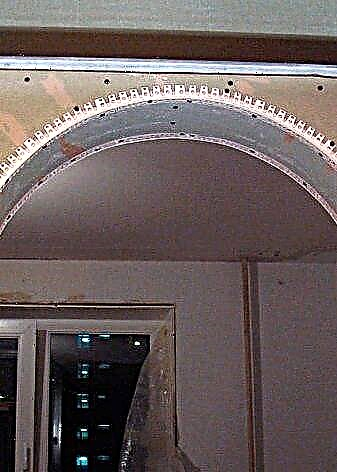
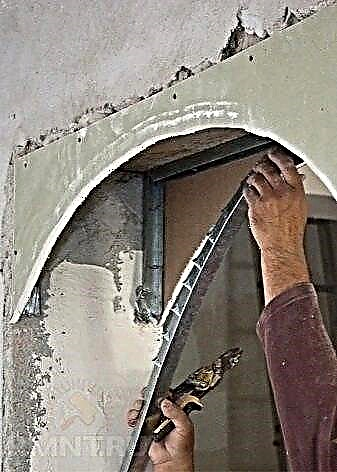
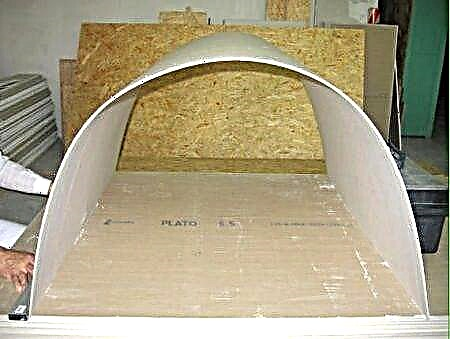
Arches and niches with a radius of 100 - 400 mm
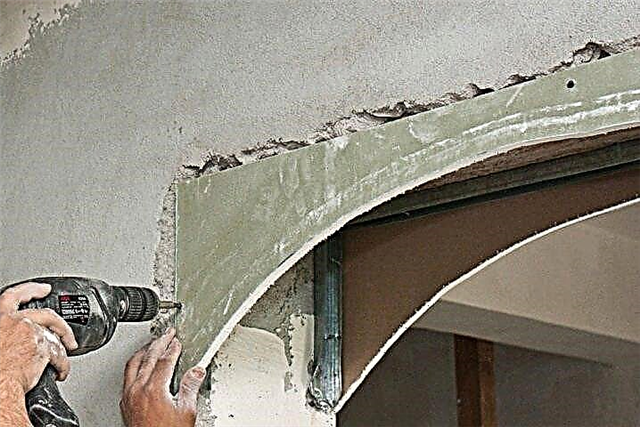
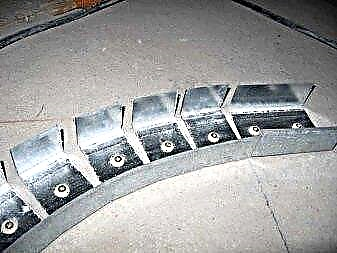
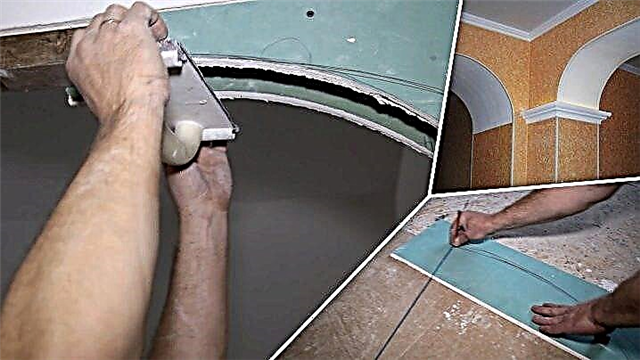
For the manufacture of such arches and semicircular niches, the technology of cutting drywall sheet is used. On the back of the sheet, straight cuts are made with a milling cutter. The pitch of the cuts depends on the bend extension. In place, a structure is made for fastening a bent sheet.
Drywall profiles are connected in the most intricate ways. To do this, there are all the possibilities from a variety of standard connectors, to independent designs such as "cut and connect."
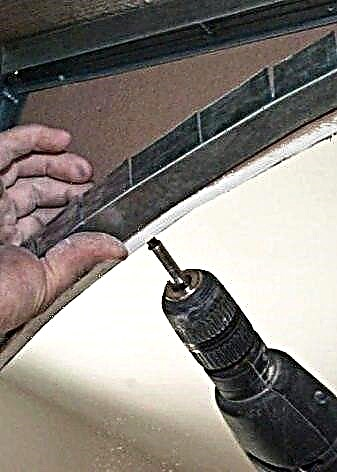
The sheet with cuts is laid in a pre-made template, and the grooves made are filled with durable gypsum putty (for example, knauf fugenfuler). After the putty is solidified, we get the finished design of the arch of small diameter.
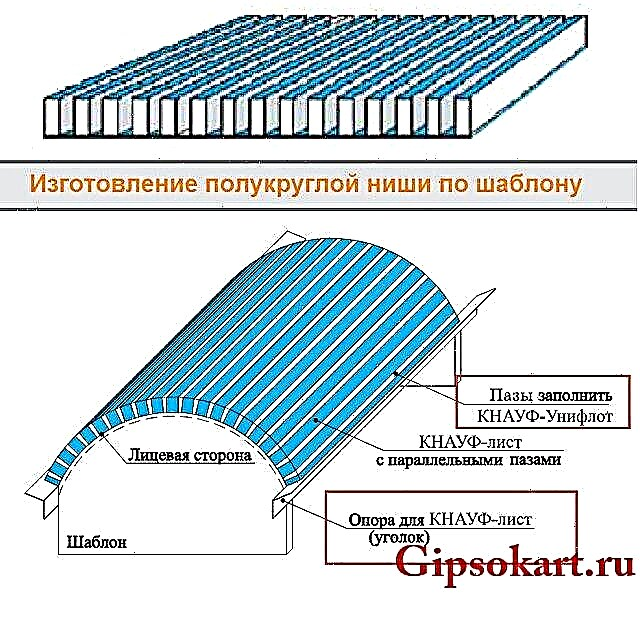
To firmly fix the bent drywall in the structure, strip of metal is placed under the gypsum cardboard.
Features of drywall arches in the interior
Drywall arches are three-dimensional constructions that decorate the openings between rooms in private houses, apartments, cafes, galleries, theaters, educational institutions and temples. They can be of different diameters, narrow or occupying almost the entire wall, simple or unusual shapes.
The base of the arch is a metal frame, to which a curved drywall is attached. To give the material a form, factory processing is used (the production of arch blanks of the GKLA brand), as well as dry and wet bending of initially even sheets. In the first case, incisions are made, in the second, they are impregnated with drywall with water, bent and, in this form, dried under pressure.
The positive aspects of drywall arches are their aesthetics, ease of installation and low cost (compared to concrete, brick, wood). Among the shortcomings can be noted low resistance to moisture. In some cases, the minus may be that the arched opening in the wall remains open, which means that drafts, extraneous sounds, smells, and light will penetrate through it.
What forms exist
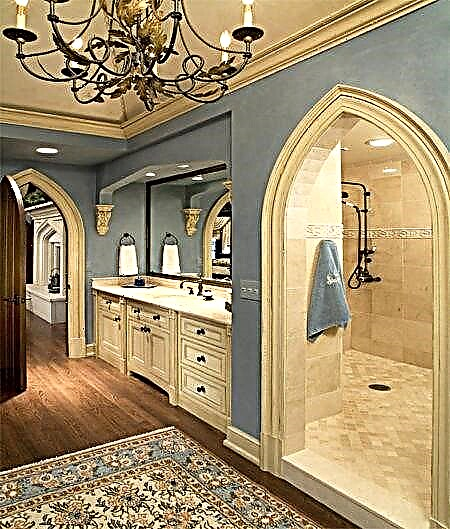
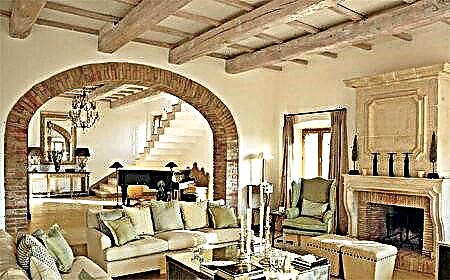
Reminiscent of ancient Renaissance temples and palaces, vaulted walkways add to the elevated interior. They are great for visual zoning of hallways, corridors, landings, living rooms, reception rooms. A large number of geometric shapes that can be given to drywall, makes it possible to choose the perfect option for any type of interior.
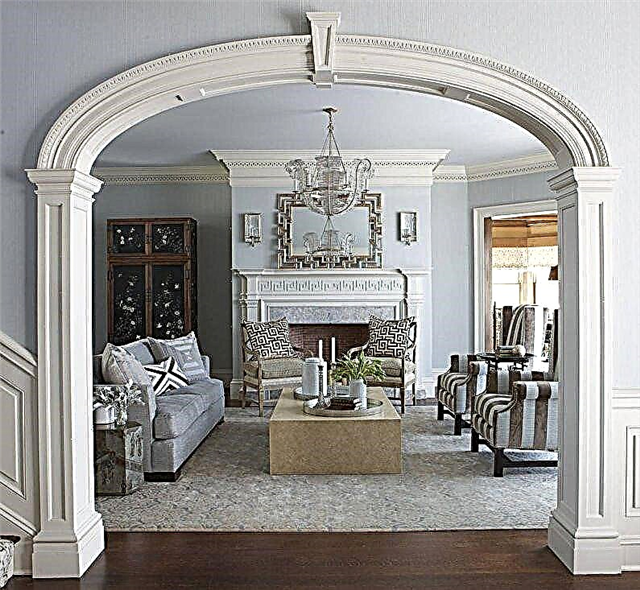
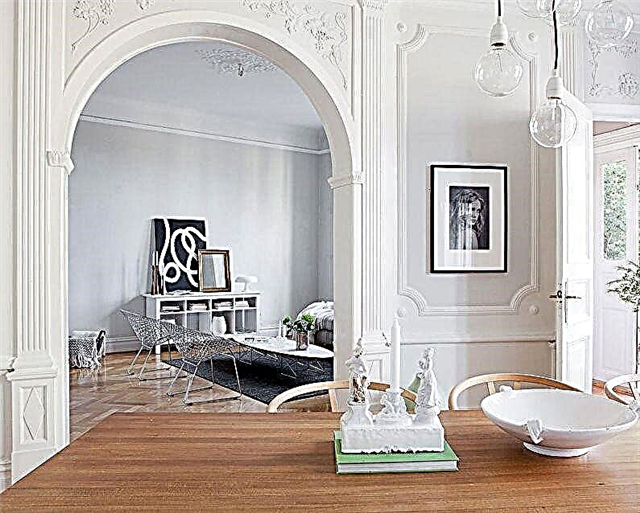
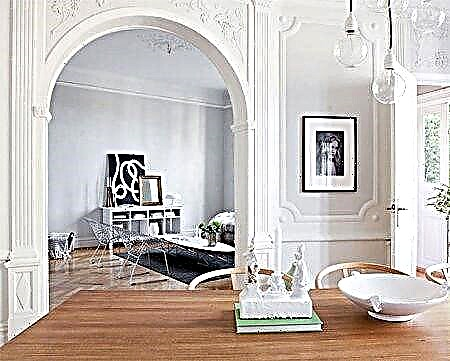
Round plasterboard arches
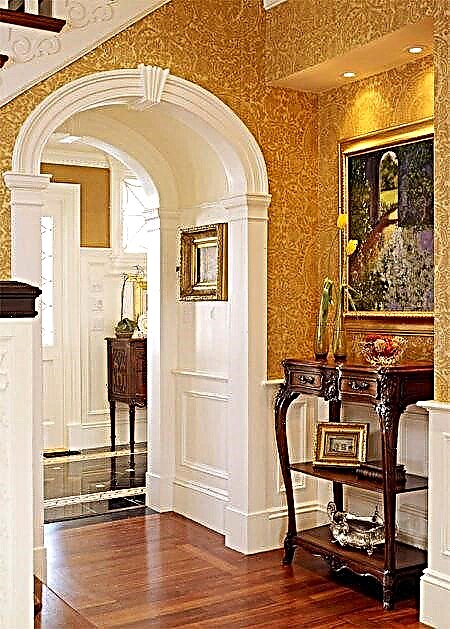
Round and semicircular arches harmoniously complement the classic, Greek, Byzantine, as well as Victorian style. They should be decorated with stucco moldings, golden or silver ornaments, make the side parts in the form of columns. The finish should be monophonic, white or a color very close to it.
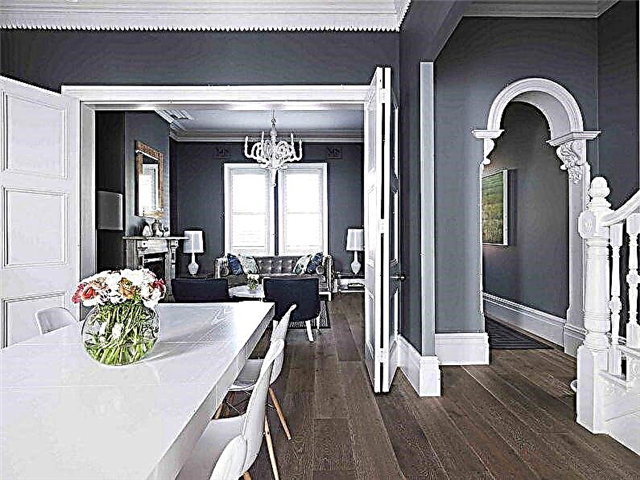
Rectangular drywall arches
Such portals are very similar to doorways. It is a good choice for a minimalistic and modern interior. They can be part of partitions with shelves located on the sides, and if necessary, even be closed with sliding screens.
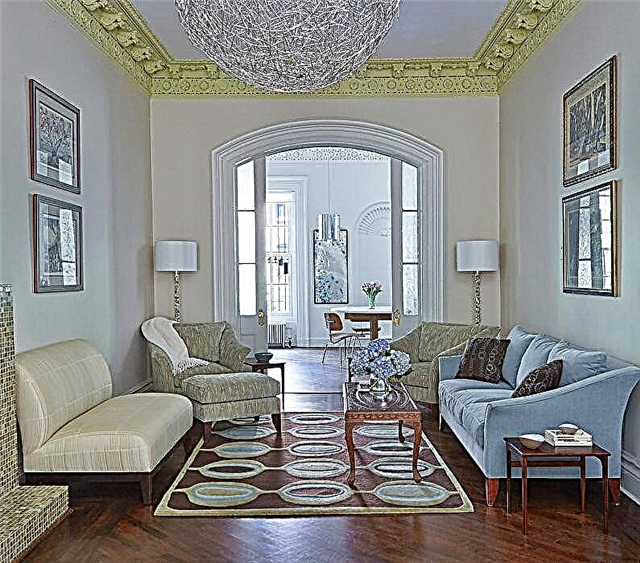
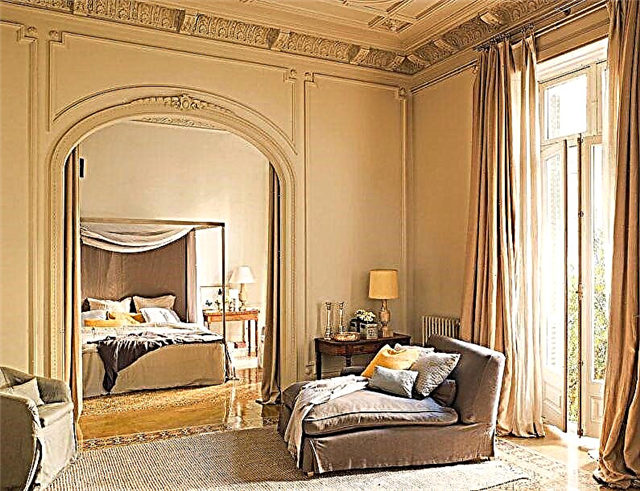
Drywall elliptical arches
Drywall arches, the upper part of which is made in the form of half a horizontal ellipse, are suitable for rooms with low ceilings (from 2.5 m). They successfully fit into such styles as modern, provence, loft, country - you just need to find the appropriate frame.
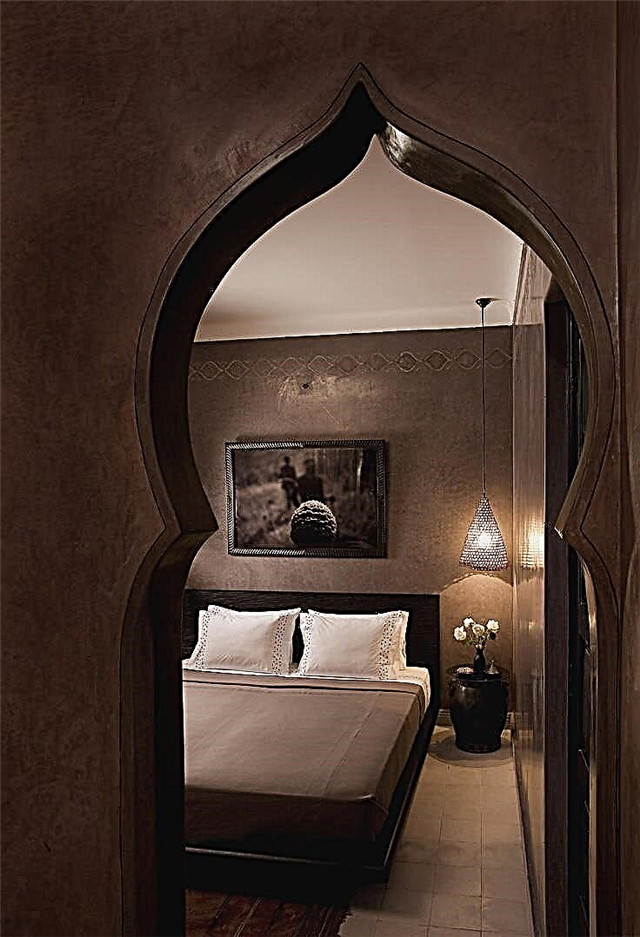
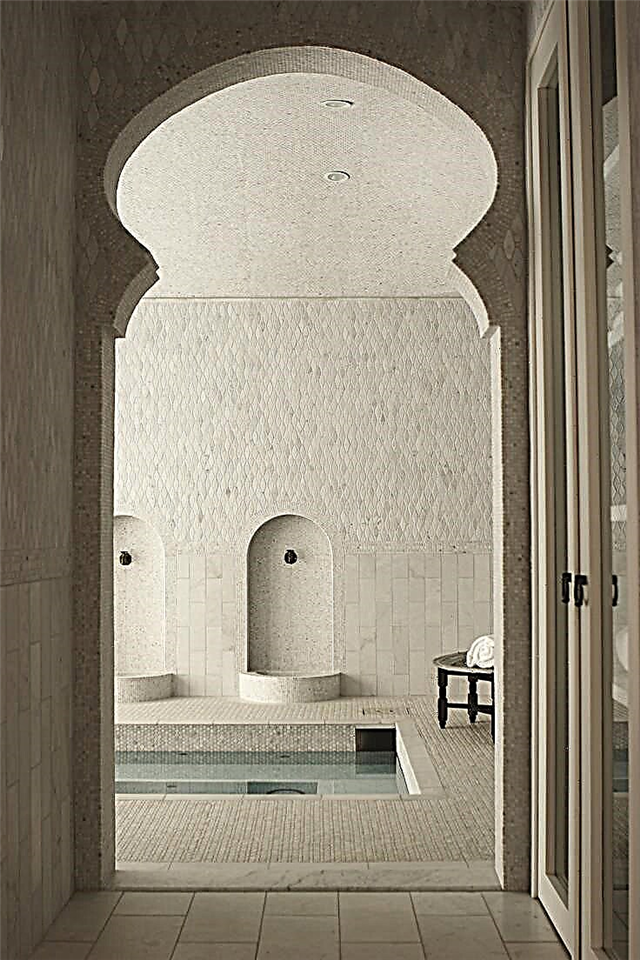
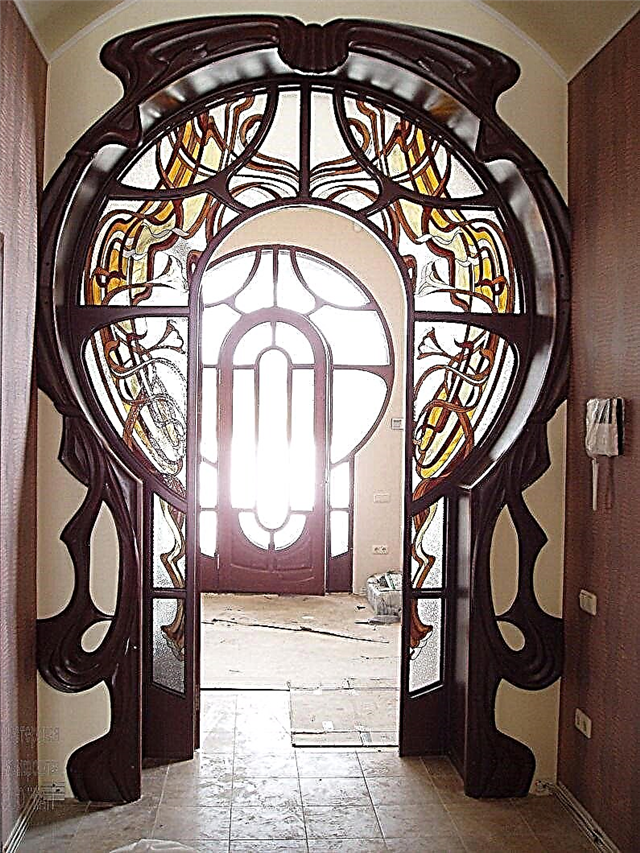
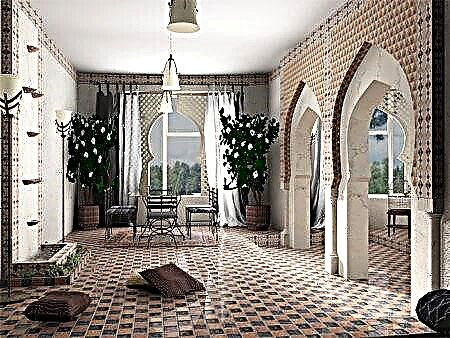
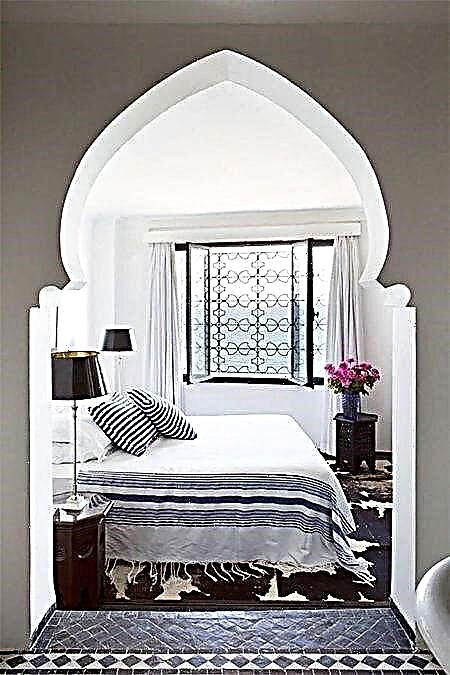
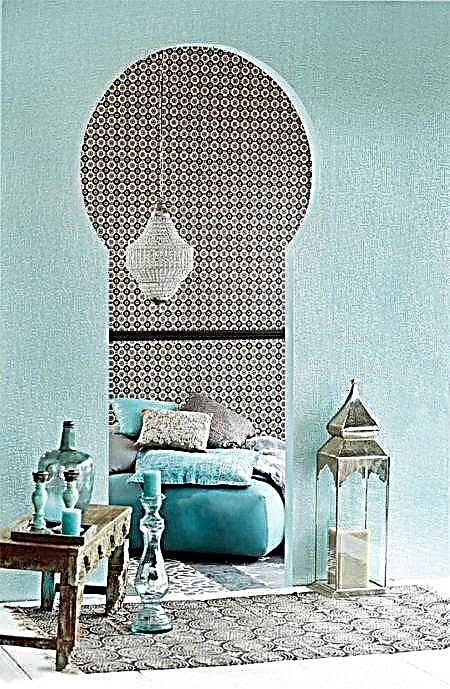
Arab / Oriental Drywall Arches
East openings are similar to pointed domes. This type of arches is characteristic of India, Turkey and all Muslim countries. In addition, jagged and wavy reliefs, complex miniature patterns of saturated colors are possible.
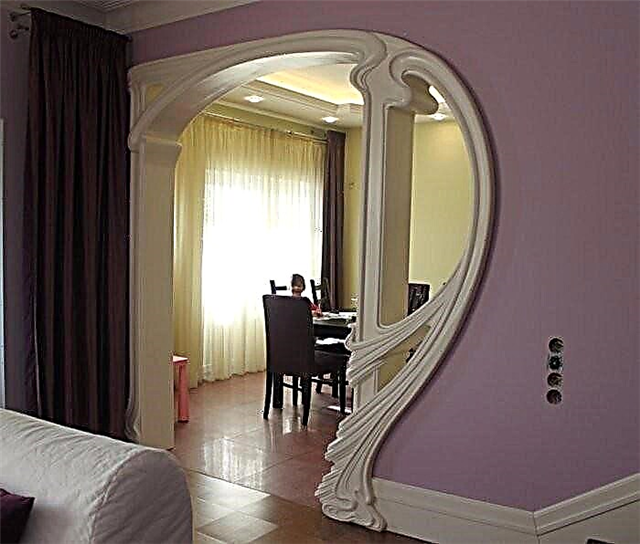
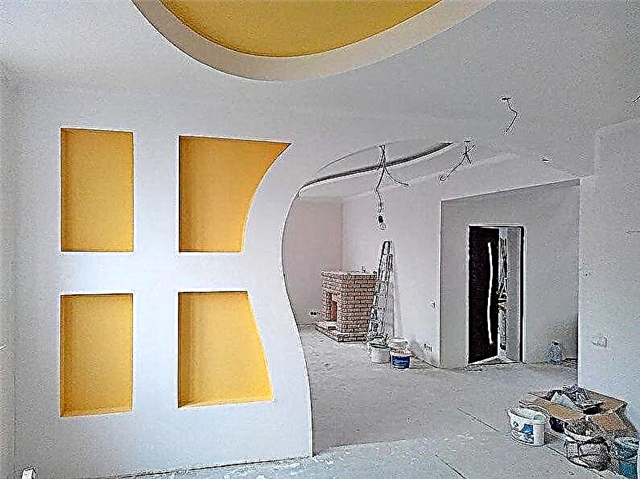
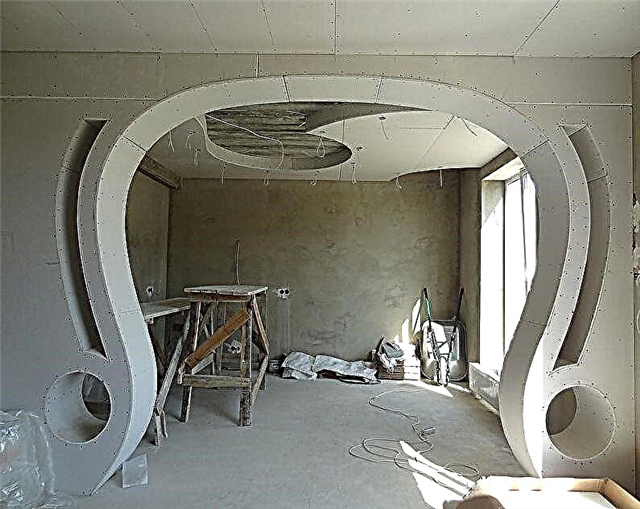
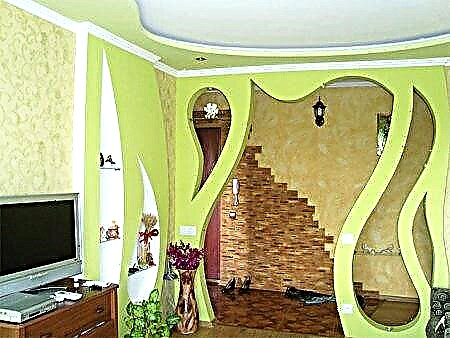
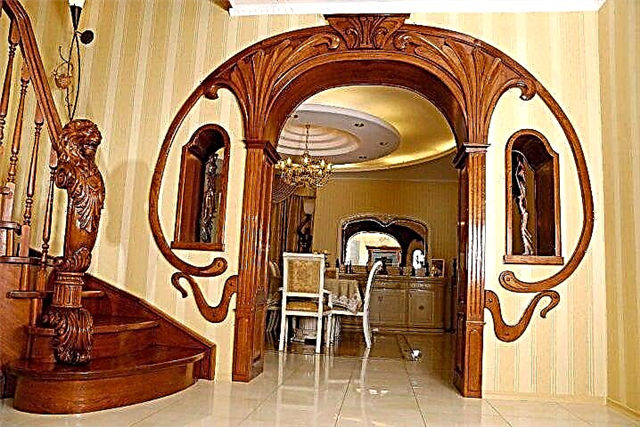
Curved Drywall Arches
Fantastic soft reliefs can become the highlight of an interior made in a futuristic, romantic or playful style. By the way, a drywall arch can not only decorate an opening in the wall, but also serve as a decorative frame around a niche.

Painting
Alkyd enamel will help to achieve a glossy effect, and water-emulsion and water-dispersion compositions will provide a matte surface.
Stucco molding and PVC decor
Stucco molding, as well as inexpensive polystyrene products in the form of various shapes and lace, will help to instantly decorate any arch. Due to their low weight, they are easily glued to a drywall base.
Wallpapering is one of the most affordable ways to decorate arched structures. It will only require more dexterity and accuracy than on smooth walls - so that no seams are visible.
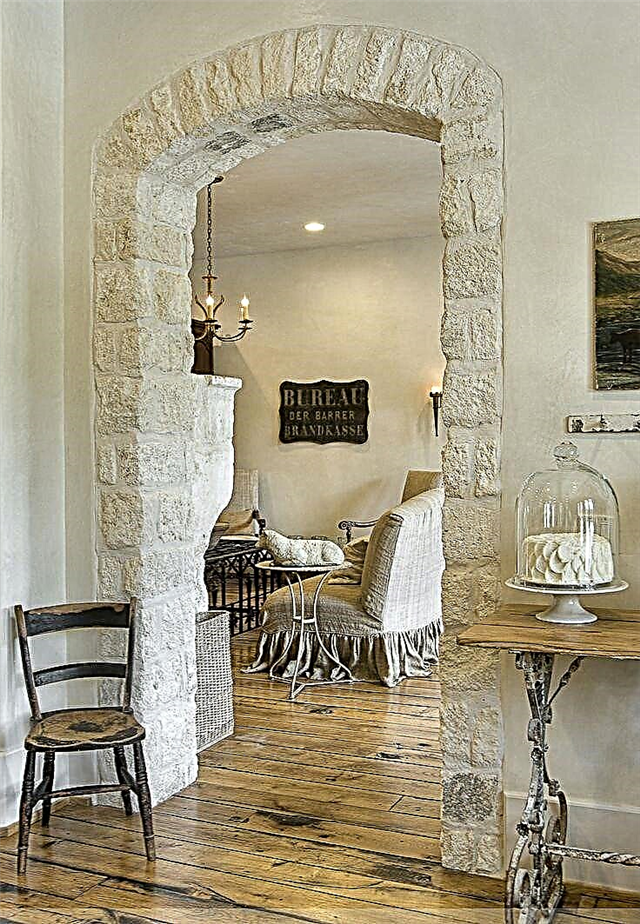
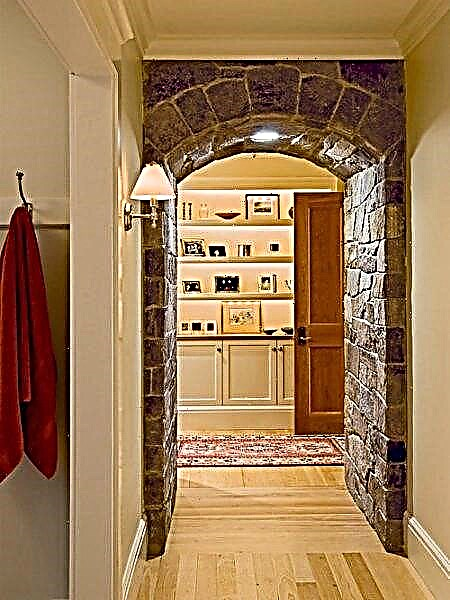
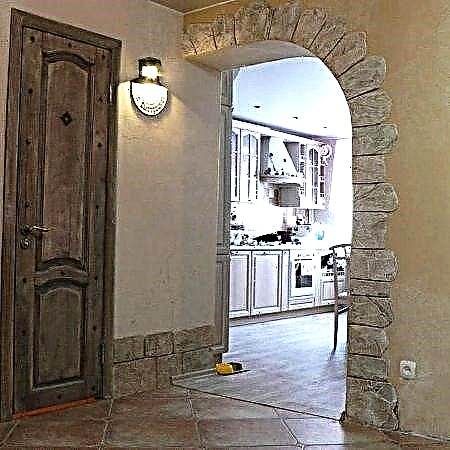
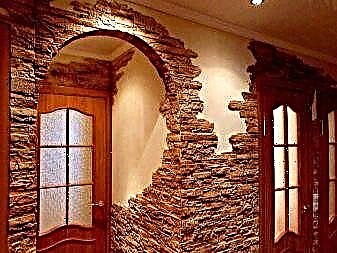
Decorative rock
Natural or artificial stone will perfectly frame the opening, giving the interior a luxurious and complete look.
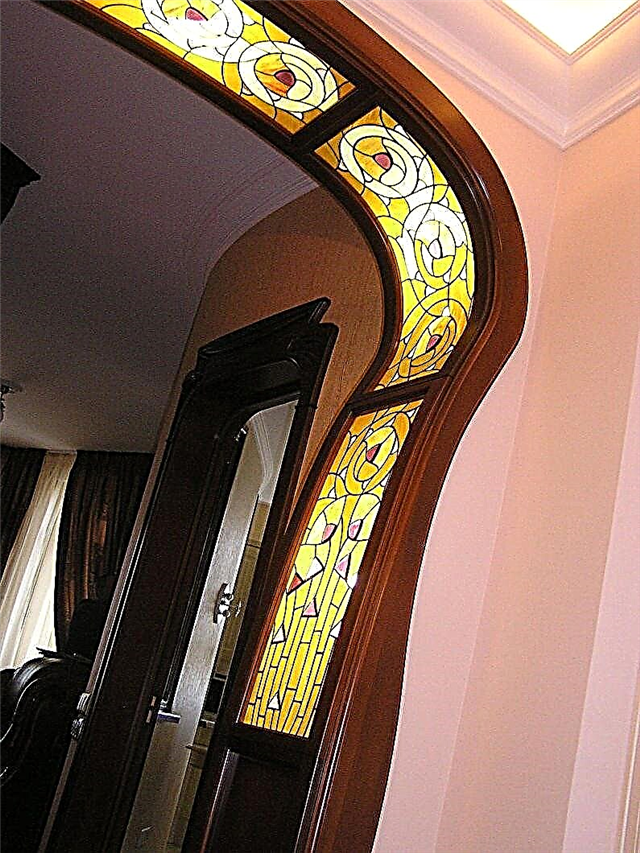
Stained-glass windows, glass, mirrors
Decorative cuts can be filled with translucent or reflective inserts. This design looks exquisite and creates a beautiful play of rays.
How to make a plasterboard arch yourself
To perform the installation of the arch, you will need the appropriate materials:
- drywall (for beginning masters it is better to choose an already curved arched (GKLA),
- metal or wooden profiles, plywood,
- screws, dowels,
- putty, primer.
Of the tools, you should prepare measuring instruments (joiner's square, tape measure), a large compass, a pencil, a drywall knife, scissors for cutting metal, a screwdriver, fine-grained sandpaper for polishing the edges, a spatula, and personal protective equipment.
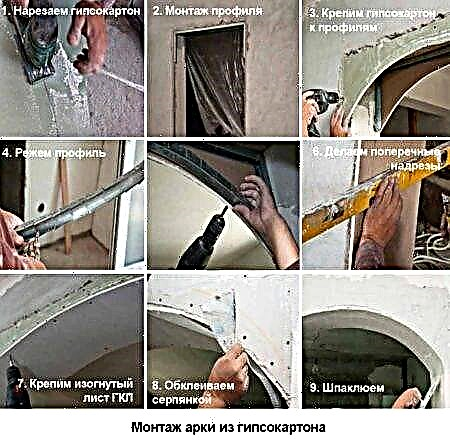
Work stages
1) Design. Based on the parameters of the room, the design idea, it is necessary to accurately determine the size and relief of the future design.
2) Calculation of materials. Drywall and consumables are better to take more than required. So in case of inadvertent damage it will be possible to continue installation safely.
3) Cutting and fastening profiles. As a result, you should get a kind of frame, suitable in width. They must be attached to the concrete wall first on the dowels, and then already fixed with self-tapping screws. The optimum distance between the screws is 10-15 cm.
4) Cutting drywall blanks, giving them a curved shape. You can visually see this process in the video.
5) Covering the frame. The diameter and length of the screws should be selected depending on the thickness of the sheets. After screwing their hats should be on the same level as drywall, so as not to create unnecessary bumps.
6) Strengthening the structure. To do this, a curved metal profile is attached to the outer edges of the arch.
7) Alignment. At this stage, you need to smooth out the roughness, putty the surface and prepare it for decoration.
8) Decorative finish.
Design Ideas & Finishes
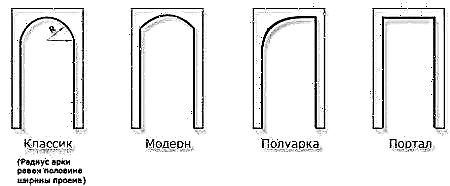
The appearance of the arches is chosen based on existing forms.

Classic They have a vault in the form of a semicircle, relevant for openings of medium width and rooms with ceilings from 2.7 m.
Arches type "Modern" remind classic, but have a more elongated arc. They make narrow openings visually wider and even look good in rooms with low ceilings.

Arches in oriental style they have carved arcs in the form of domes of various shapes and are used mainly in the interiors of Indian, Japanese, Arabic, Chinese styles with high ceilings.

If you want a simple arch, which in appearance resembles a classic doorway, choose "Portal". This is a rectangular design, optimally suited to any interior, with different ceiling heights.

Other types of arched vaults - slavic, thai, trapezoid. They have similar features with the architectural elements described above.

Exclusive arched openings deserve special attention. Their appearance is not limited by anything, and niches, shelves, windows, bar counters, etc. are used to complement them.
In rooms with low ceilings, wide openings look better, and with high - medium widths. Narrow arches are relevant if they are placed nearby in the amount of 2-3 pieces.
The arc of any arch should be at the optimum height - not to be too low and not rest against the ceiling.
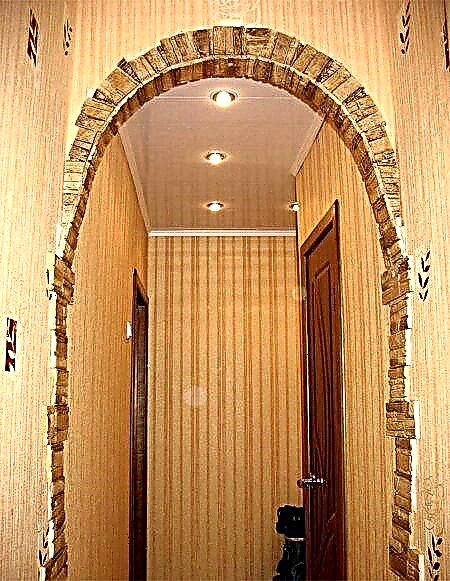
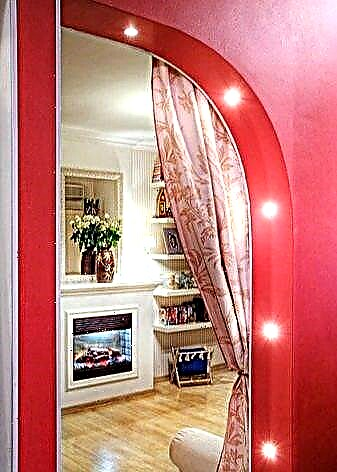
An additional effect is achieved with the help of LED spotlights installed in the arch of the interior doorway.
Overview of finishing materials
Finishing of drywall arches is carried out using any materials: paint, wallpaper, decorative plaster, panels, ceramic tiles, etc. Depending on the selected processing method, the requirements for surfaces lined with gypsum plaster change.
Finishing work is carried out at the end of installation and the completion of wet processes in the room. Air temperature should not be lower than +10 degrees, and relative humidity - not more than 60%.
Paint
The arch can be painted with paints based on non-lime or water glass. Oil, polyurethane, epoxy and other types of paints can be used in accordance with the requirements of the instruction and after finishing putty and grinding of the working surface.
Under staining, including using structured paints, an improved or high-quality finish is performed, which is dictated by the requirements of regulatory documents.
In addition to standard paint, you can use structural. It has improved viscosity, so it is well applied to drywall. It has a white color, which is changed to necessary with the help of dyes (colorants). The desired pattern on the base receive a conventional or toothed spatula, textured roller, sponge, or any other known method.
Some paints do not require such processing, they have their own pattern, which appears on the surface after application. Before use, carefully read the instructions, because when applying the coating there are many features that must be observed 100%.
Attention! Dye and paint must be produced by the same manufacturing company.
Wallpapering should be done after the primer has completely dried. Drywall adhesive is used.
The process of applying rolled material to surfaces made of gypsum plaster is similar to that used during the processing of substrates from other materials.
If the wallpaper has a free pattern, make sure that it matches the edges. To do this, stick the first strip, find the continuation of the pattern in a roll, cut and fix the second strip next to it.
You may need an extra roll, as part of the wallpaper will go to trim.
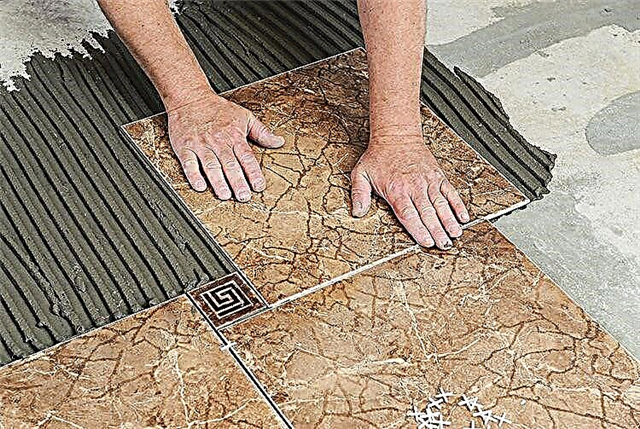
Ceramic tile
When choosing a ceramic tile as a facing material, you need to know that in this case, increased demands are placed on the bases. They must be perfectly even and have high strength. Puttying is enough to produce in the area of seams and screws, coating their hats with a solution.
After the solution has dried and its subsequent grouting, the entire surface of the lining is covered with a primer with a brush or brush. Special glue is used for tiles. Applied with a notched trowel.
Attention! The places where pipes pass through the drywall, as well as the edges of the sheets, are primed especially carefully.

Before facing the wall, you need to calculate the tiles taking into account the seams and glue it from the center to the edges to create an aesthetic appearance. It will take a little more material, but in the corners there will not be pieces of different widths or the same, but small size. The seams between the tiles are formed by plastic crosses, sealed with special fillers.
Artificial and natural stone
Decorative panels
The panels are made of plastic, MDF, gypsum, wood. For interior decoration, plaster and PVC are more suitable. Their feature is a huge selection of colors and patterns. Plastic is more used for wall cladding in cottages and in places where people spend little time. In apartments and private houses, its presence on the walls is not entirely solid, although the finish looks great. A good option is a kitchen apron. There, the material looks beautiful and appropriate.
PVC panels are mounted on a crate or special glue. The area on which the sticker is planned is carefully cleaned and primed. Gaps and uneven edges are hidden using the start, corner and dock profiles. After installation, the panels are wiped with antistatic to eliminate static voltage. Leaving involves the use of solutions without chlorine, solvents, caustic substances and abrasive particles.
Gypsum panels are a true creation of art. Their design is so unique that it is not possible to create similar masterpieces using other finishing materials. Lining with gypsum panels, like PVC, is more suitable for walls adjacent to the arch. The arch itself needs to be designed for the main drawing after mounting the plates with other compounds.
The weight of one panel is 4-7 kg. If the frame of the interior partition and arch, including made of metal profiles, it must be reinforced over the entire width in order to support the weight of the finish. But it is better to use panels in the case when the arched arch is formed in an existing opening.

Installation begins after priming the surface and is carried out in the following sequence:
- Plaster glue application with a thick layer of trowel,
- Removing excess glue with a comb,
- Sticking the panel, light pressure,
- Sealing joints with plaster putty,
- Grinding seams with sandpaper
- Application of a deep penetration primer,
- Painting panels with a spray gun in 2-3 layers with a break of 1 hour.
Wall painting
Painting is an expensive way to finish. A simple application will cost 5000-6000 rubles / m 2 (geometry, flowers), the average - from 6000 to 15000 rubles / m 2 (landscape, still life, architecture). Only photos of people, including those redrawn from paintings by artists, are more expensive.
The painting is applied in various ways. This can be a canvas, which is then pasted on top of drywall, or work directly with paint on plaster. The advantages of the first method are that in case of unforeseen circumstances the canvas can be temporarily dismantled.

And the second method is universal and is used even in rooms with high humidity conditions. Finishing plasterboard surfaces for painting involves applying putty to the joints and in the places of fastenings, grouts, acrylic primers.
The liquid wallpaper
Liquid wallpaper after application resembles decorative plaster, but have differences in composition, method of application, etc. This type of finish is good because it hides minor bumps in the walls.
Before applying wallpaper, the base of drywall is primed in 2-3 layers. Before starting work, the material is prepared. To do this, pour the contents of the bag into a container of water of a certain volume (depending on the type of collection), mix thoroughly with your hands, collect it back into the bag and leave for 12 hours.
Each package has a shine, if you need an additional effect, it is poured out first, and then a dry solution is added.
Attention! One package is enough to process 3-7 m 2 of surface. Calculate the area in advance and prepare the right amount of solution. Put each bag in a separate container. Do not be afraid to work with your hands, the material is neutral for human skin.
Work Stages:
- Apply liquid wallpaper to the surface horizontally, evenly distributing them with a trowel. Hold the tool slightly at an angle
- Apply the second layer vertically on top of the first,
- After covering the entire surface, walk over it again with a damp trowel, removing bumps,
- At first, do not touch the wall and arch until the material grabs and completely hardens.
Liquid wallpaper can be applied over old ones and even make beautiful ornaments with their help.
Sizes and shapes
Of course, no one argues with the fact that large arches look better in spacious rooms. Arches can be part of the hall, kitchen, dressing room. In small apartments they will be less noticeable, and somewhere completely contraindicated.
Most often, for urban apartments, designers recommend arches that are unusual in shape and size. The size can be adjusted using the previously mentioned drywall. Due to the fact that the weight of the arches does not affect the side walls, the structure does not become loose over time.
In this regard, experts also recommend equipping curly arches with glass or a mirror. The mirror visually enlarges the space, and this will be useful in small rooms. And with regards to glass, due to its physical property (it transmits light), it will be possible to additionally illuminate the room from the opposite side.

In recent years, a semicircular arch has been gaining popularity among customers, especially in the so-called Khrushchev. The apertures in houses of this type are not very large, and if you also reduce them yourself, you can enter the room only with your head down.
A semicircular arch is a kind of intermediate state between a rectangular structure and a familiar round one. But at the same time, it, in turn, is also equipped with switches and lamps, which means that from a functional point of view, it is not inferior to them in anything.
Materials
The frame of the future design is made of a metal profile. By the way, not only openings for arches are made of a profile, but also niches for cupboards, and with its help even whole walls are erected. The profile is either aluminum or steel. Both the first and second when using additional tools lend themselves to deformation, in connection with which it is possible to produce not only straight, but also curly designs.
Subsequently, the resulting metal base is sheathed with drywall. Based on the name, it is easy to guess that drywall mainly consists of gypsum. Construction paper, resembling cardboard with its appearance, acts as a protective layer.
Drywall in its original form is unsuitable for processing. It will be difficult to glue the wallpaper or paint the wall in any color.
For these purposes, fiberglass was invented at one time.
Fiberglass is an absolutely natural non-woven material. It is based on mineral fiberglass and you can glue wallpaper and paint. Therefore, to decorate the future design is not difficult.
Accommodation options
- Quite often in living quarters there are kitchen arches. Most likely, this is due to the fact that installing the door to the kitchen is already unfashionable. Something similar is being realized in studio apartments, where guests can freely move between the living room and dining area.
Of course, it is impossible to demolish the load-bearing wall in an apartment building from the point of view of security, but it is easy to equip with an arched opening.

- But the hallway is still a popular location. Both round and semicircular options are suitable for the corridor. If a built-in closet is already installed in the hallway and plasterboard cladding is not possible in principle, rectangular arches will be suitable as a solution. As previously noted, arches with lighting are installed in the hallway. Thanks to the backlight, the corridor will not resemble a closet.
- It is somehow not customary to install arches in a bedroom in an apartment. And this can be understood, yet the bedroom is a secluded place. In the room intended for sleep, you can relax in the daytime, so the door is needed in it.
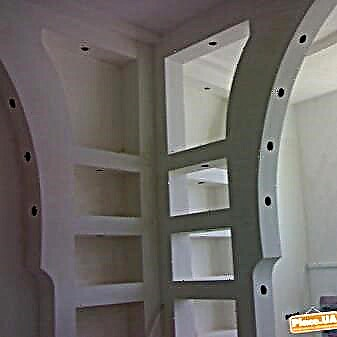
- But in the hall most often ordered arches with shelves. On the one hand, this is an additional place for storing things, on the other - a complete replacement of a display case. So, there will be no difficulties with the collection. Such a niche can be equipped with additional glass.
- But if in an apartment the flight of fancy is limited by the size of the room, then in your house there are no restrictions. Arches fit into any interior: both classic and modern. They can be an additional touch to the wooden stairs or to the entrance. And the arches located in the living room, as in studio apartments, may be a logical continuation of the kitchen.
How to finish the arch?
It would seem that there is nothing easier than to take and issue a contract with a company that is engaged in finishing work. A team of craftsmen will arrive on the appointed date and in a few hours will cope with the task. But at all times, any man always wanted to personally equip his home.
It is generally accepted that if a man has a head, then a woman is a neck. It is not surprising that it is female whims, as a rule, that a man has to fulfill. A sketch of the planned is created with the wife’s light hand, and the husband’s task is to bring the plan to life.
Finishing the arch just begins with the plan. First of all, it is necessary to decide in advance what material this operation will be performed. Is there enough money for natural materials or can you do with building materials for wide consumption.
The part of the wall glued to the wallpaper adjacent to the arch also looks appropriate. Frankly, in most cases, it is the wallpaper that trim the arch. Of course, you have to tinker a bit when cutting and fitting wallpapers, but in terms of saving money and time - this is the best option.
And if you also use special wallpaper for painting, then you can make another cosmetic repair after a short period of time. Painting also helps at the moment when it is simply too lazy to peel off and glue the wallpaper on a new one.
You can refine the arch using plastic panels. At the beginning of the new century, plastic was often used in the repair of office and government facilities.
But it is worth remembering that plastic is subject to mechanical damage, and to everything else it is easily flammable.


A convenient arrangement of the premises is the key to the well-being of any family. If the owner of the house responsibly and competently approaches this process, then not only the decoration of the arches, but also the manufacture of any structures will be on his shoulder.
Who knows, maybe in difficult economic times this skill will make it possible to earn extra money, and, perhaps, it will become the main job. It is especially pleasant when work brings not only money, but also pleasure.
How to do it yourself?
Within this section, I would like to dwell in more detail on two points. The first point concerns the construction of arches from a metal profile and drywall, and the second is devoted to decorative decoration.
If you are going to erect a frame in one of the rooms, you must first prepare the site.
To do this, remove the existing door from the hinges and dismantle the door frame:
- If the door is made and installed in recent years, then no special problems should arise. Using a Phillips screwdriver or screwdriver, unscrew the screws located in the door leaf. The door should be removed to the side and proceed with further dismantling.
- Using a regular flat screwdriver we remove the platbands. Under them, "mounting foam" is hidden, on which the entire structure is held. Using a kitchen or construction knife, free the door frame.
- Be very careful. There is a high probability that wires are hidden under the platbands. Very often telephone wires and wires related to burglar alarms are walled up from prying eyes. Their damage will lead to at least a specialist call.
After a series of simple actions, the opening for the future arch is ready. A dismantled door leaf can be offered to friends or relatives, provided that the dimensions of the doorway are the same. Most modern houses are built in a standard series, which means that the chance of this is great.
Otherwise, the dismantling of old doors looks like they usually rest on nails. And from this it follows that to save the product in its original form will not work. You will have to use a hammer, nail clipper and other tools for dismantling.
The most time-consuming dismantling is for those people who want to install an arch in a room if the door frame is metal. Or if there is a desire to expand the opening a little. Since part of the wall will have to be broken out using additional tools.
After the site has been prepared, the next stage of work remains. This can be either the installation of the finished product with your own hands, or the creation of an arch of drywall. The finished arch must first be ordered through intermediaries, the production time can be up to two weeks. During this time, it is necessary to dismantle the door frame.
On the day the product is delivered, all that remains is to install it. The easiest way is to mount a rectangular arch, according to the principle of installing the door. Just do not hang the door leaf on the hinges.
In order to achieve the usual roundness at the arch, you should use the fiberboard sheet. After making accurate measurements, we cut off unnecessary parts with a jigsaw or an ordinary saw. To fix the fiberboard sheet, we will use construction foam.

You should not save on polyurethane foam. Since, if the contents of the can are of poor quality, then in the best case there will be a long wait for hardening, and in the worst - the sheet will not consolidate at all and after some time will make itself felt.
Alternatively, you can use self-tapping screws. To screw them in you will need a hammer drill and a screwdriver. Mounting should be done in several places, this is also not worth saving. The formed cavity can be sealed with the remnants of the fiberboard sheet, fitting them to the size, and screwed again to the screws.
At the same time, you can putty the walls. This in the future will save time and nerves in the further decoration of the arch. In principle, you can postpone this lesson to the far corner and proceed with the direct installation of the product.
Do not forget about one important point. After installing the arch, the doorway will narrow in height and width, which means that there is a high probability of difficulty in transporting large items and household appliances, including a refrigerator around the apartment. Take care of this in advance.
We proceed to the final work:
- To do this, you can use liquid nails or foam. Platbands in most cases eliminate all errors and shortcomings. Remember that if there is a need to establish a platband for wires, you should do this at the beginning of the final stage.
- The installation or decoration of arches made of plastic panels follows the same principle. The main feature of plastic panels is that they fit together like a puzzle. This is a stable mount, the plastic will not open during the operation period, and the panels will not fly like a house of cards.
- Plastic is cut again with a jigsaw or saw on wood. Errors are eliminated by plastic corners, which are mounted on liquid nails, joints should be treated with white sealant.
But there are often cases when you can not do without the construction of the frame. A common building material for solving this problem is drywall. It is resistant to temperature extremes, moisture resistant, and everything else is sold at affordable prices. A universal solution for wealthy people and less affluent people.
As part of this section, we consider the simplest way to build a frame:
- To create a base on which drywall will be attached, a metal profile is required. In most cases, a steel metal profile is used. Because the variety made of aluminum differs in price in a big way.
- By the way, sometimes there is a need to align the walls, for this purpose, gypsum cardboard is first glued.Using the building mixture - putty and PVA glue, we fix the drywall with the wall. To fix the result, we will use self-tapping screws. Periodically check the evenness of the construction level.

- Drywall is easy to cut, so it’s best to use small pieces. Roughnesses appearing on the front side are eliminated with the same building mixture.
- To create a platform directly under the arch, it is enough to glue drywall only in the upper part of the doorway. It takes about half an hour to do such a job. If alignment around the entire perimeter is ahead, the time for work will increase in proportion to the plan.
- It will take about a day to fully dry. Then you can begin to fix the metal profile. But in the beginning, a pattern will be made - a template for the future design.
- To do this, a sheet of drywall is attached to the top of the opening and a sketch is made with a pencil. To make an exact circle, you need a compass. In a building environment, compasses of such large sizes are made from improvised materials - profile, pencil and self-tapping screw.
- Since there are two sides, then there will be the same number of templates. Sawing is easiest to do with a jigsaw. It remains only to sand the surface.
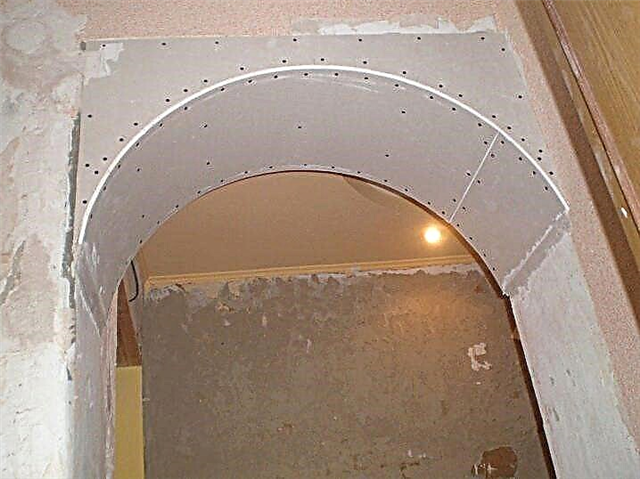
- In the future, you need to cut drywall, designed for a cavity in the central part, to incise on one side, so that gypsum can be easily bent into an arc. 4 cm should be retreated. For this work, use an office or construction knife. It remains only to slightly break.
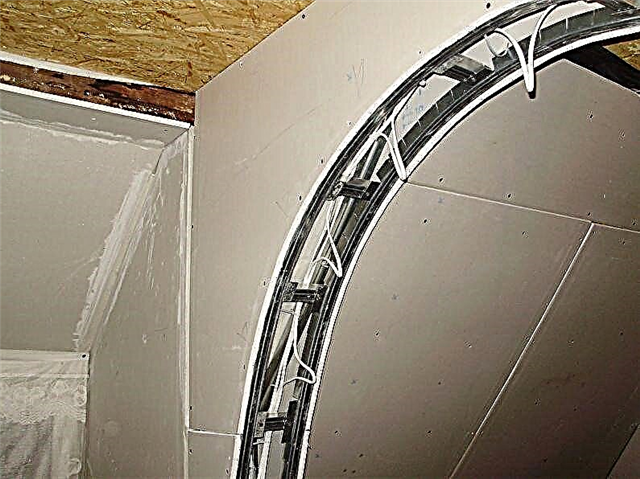
- After you should attach the steel profile to the wall with screws. Remember that you need to step back a few millimeters from the edge of the slope (to the width of the drywall sheet), otherwise the sheet will bulge. Using scissors for metal, we make cuts every three cm at the metal profile, which will complete the steel frame. There should be two such details.
- Fasten the resulting parts to drywall templates on the table. Directly in the opening will only be fixing them.
- Prepared previously incised drywall fasten the screws to the metal profile.
Thus, the simplest design is ready, you just have to use the tips for decorating the arch. Similarly, more intricate structures are constructed. Drywall and metal profiles in tandem contribute to the construction of semicircular arches, and arches with niches, and with ledges. This list can be endless, just not describe.
We will dwell on the backlit version in more detail.
The process of modernization of ready-made solutions also does not take much time and effort. Therefore, we assume that the simple frame described above is already available in the room and, moreover, the cable has already been laid.
- If you are going to create a ledge for spotlights, you must first introduce a comb in the design. A comb in the language of finishers is a ledge constructed from a sheet of drywall, it is attached to the wall using a construction stapler and metal components. Remember that the resulting construction must be putty.
- Using ordinary crowns on wood, a cut is made on the crest. A pre-prepared circle cut from plasterboard is inserted into the formed opening. And all further actions are already done directly with this circle.
- Cut a hole in the circle to fit the size of the future spotlight. Its size should be indicated in the instructions. The easiest way to do this procedure is with a screwdriver and a special nozzle. It remains only to connect the wire and the spotlight, periodically glancing at the attached instructions.
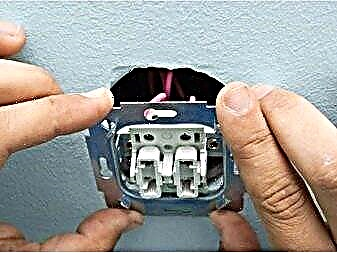
If the head of the family has knowledge of electrics, for him to mount not only spotlights, but also switches will not be difficult.
- Along the way, you can prepare the arch for decoration, namely for wallpapering. To do this, you need to stick wallpaper for painting on a pre-treated surface. The thing is that the paint will hide all errors, they will be known only to the person who made the repair.
- Wallpaper that goes to the plastic corner is easiest to cut off with a stationery knife. It turns out an even cut. But you should prepare in advance for the fact that the blades will have to be changed very often.
- It will be useful to take a brush and paint and walk lightly around the corners. Unfortunately, wallpaper glue is not enough to ensure that the wallpaper joint is even. To fix the effect, the excess edge can be cut with a clerical knife.
- After the wallpaper glue has completely dried, painting is carried out. Paint can be taken in any color, it is only desirable that it is suitable for the future interior. Remember that light colors contribute to the visual expansion of space, in contrast to dark.
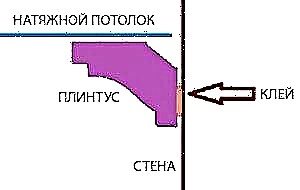
- Quite often, in the manufacture of the frame, you have to dismantle the old baseboard. Instead of a skirting board, it’s more advisable to buy a new one. Moreover, modern options are already adapted to hide wiring from unnecessary eyes.
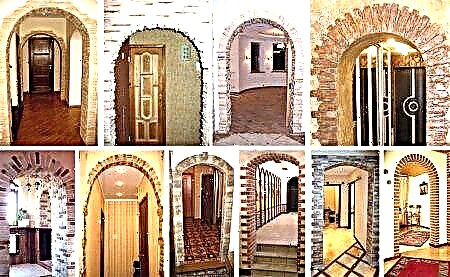
Beautiful photos of arches in the interior
In conclusion, I would like to note that any adult man, having a small set of tools, can make interior arches from drywall. They can be equipped with shelves and lights, decorate with glass or mirror inserts.
As an aid, the most successful solutions will be placed in this section. It is possible that it is the photographs presented that will push one of the readers to specific actions.
Arch Properties
Each arched product has a certain finish and its own advantages. The latest models of drywall arches were invented, the installation of which is aimed at making the space unified, avoiding stereotypes.
 Possible forms of drywall arches
For example, in the living room, at present, many refuse to install doors, but prefer the arch so that visitors entering the room feel united with those present. So, the interior plasterboard arches:
- smooth out angularities,
- connect small rooms to a whole room,
- landscaping vast spaces
- are the best solution for finishing narrow aisles,
- make the home comfortable and luxurious.
Varieties of arches
Today it’s realistic to design any arch, the one that the customer needs. Conditionally similar models can be divided into 2 types:
The first is characterized by the transparency of the rooms, at the entrance there is the visibility of several rooms at once.
 Existing varieties of arches in the apartment
This variety serves more to decorate the space. Their complexity is dictated by the originality of the interior. Arches of the second type are used in small areas, they are simple in design. In addition to the above characteristics, these models can be classified according to another principle.
| Types of arches | Description |
| Classical (Roman) | For their manufacture, smooth arcuate shapes are used. Arches look great in almost any room, but can take away the height of the opening. |
| Modern (British) | Original in design, suitable for large spaces. They have segments and look better in front of the window. They will approach walls with a small relief, thick walls, wide openings. Combined with wood trim. |
| Slavic | They have a rectangular design and rounded edges. Suitable for any room interior. |
| Portals | Simple, but original designs will be appropriate in rooms where the door has become less relevant. They are made in the form of a rectangle with decorative trim, placed along the doorway. |
| Thai (half) | They have various sizes. One side of the model is rounded, the other is rectangular. Outwardly very attractive, are popular. |
| Ellipsoid | They have ovals of various shapes, give the space a unique look. They are used in rooms with low ceilings. |
| Trapezoid | In this case, right angles are decorated with decorative trim. The made arch does not require large investments. |
| Romance | Curves have been added to the top of the flat base. It will also cost customers inexpensively. |
| Transoms | It combines a partition with an arched structure and a door leaf. A wide opening is closed by a stained-glass window or other decorative element. |

Design Classification
The customer has the opportunity to give preference to a suitable design of the arch model in the interior from the variety of existing ones. It could be:
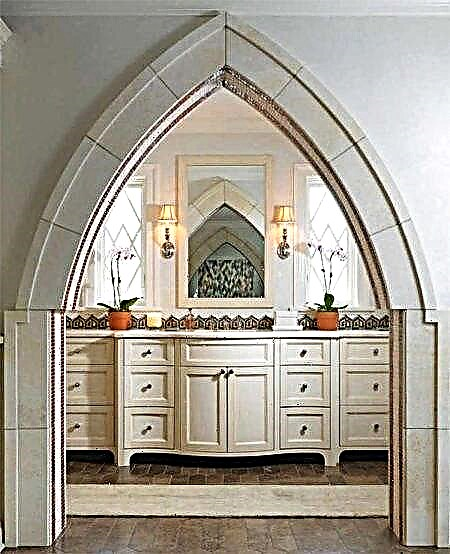
- The design having a lancet shape. It is suitable for lovers of the Gothic style. As a result of the reduction of the two planes at an angle, an upper point is formed on top of the structure.
- To achieve an openwork effect, small through holes are located in the lateral planes of the model. This version is more complex, suitable for the place of wide doors in the living room or bedroom.
- Variants of arches in several levels with intricate shapes are possible. The manufacture of such products is advisable to trust only to professionals.

It is important not to forget that when installing drywall arches in an apartment, you should heed the advice: it is not recommended to use them if the height of the openings is less than two meters. Video and photo review of the proposed models will allow you to choose a suitable design for the design of the door space.
Bending
Before cutting drywall, it is necessary to carefully perform all measurements and make a drawing. Then they start the cutting process, which happens like this: first, a line is drawn with a long ruler and an incision is made with a construction knife, and then a deeper plaster groove is made. Next, the sheet must be gently broken along the length and cut the bottom cardboard. The hardest thing is to bend. It can be made in several ways:
To draw the correct semicircle will help rope, pencil and self-tapping screw. They fasten the tip of the rope in the center of the circle, a pencil is tied to the other. In this way, the correct arc is drawn.
- You can bend drywall in the following way. It is necessary to measure the distance for the future arch with a thick wire, then bending it, cut the desired part along the length.
 Knock down wooden blocks in advance, one should be longer, the same as the model of drywall, the other two are small. The design is in the form of a regular mini-bench. Turning it “legs” upwards, a cut thin sheet with notches made along the entire length is placed on them, soaked in water. You can also put a heavily moistened towel on it for 20 minutes or use a studded roller. After a while, the part will take the form of a semicircle by way of self-bending gypsum board. The product must be carefully taken, inserted from above onto a support and fixed. Then there is a further finish. It is important to remember that excess moisture must not get on the material. This option is suitable for arches of large radius and takes a lot of time in the manufacture. However, after its application, there is less waste of mixtures for finishing. Suitable for acquiring a perfectly round shape and a regular chair or stool,
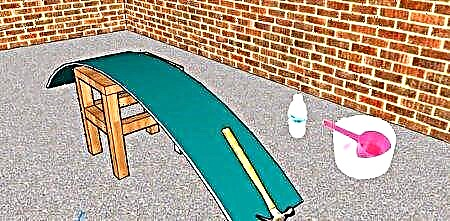 Drywall Bending Process
Installation process
Part of the room, designed to accommodate the arch, requires careful preparation. The door frame should be completely removed, perhaps even the expansion of space due to the wall. Dust and debris must be avoided.
 Interior Arch Design Diagram
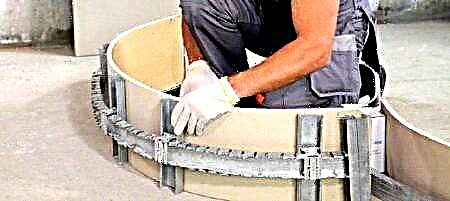
- First of all, markup is made, for which you can use a plinth made of plastic, a lining rail, any elastic material. It must be bent by an arc and inserted into the created hole. At the edges of the arch make marks.
- Further, for fixing the metal profile on top and on the sides, guides are installed. Small indentations should be the same size as the thickness of the drywall. To avoid skewing, you need to align the gaps between the profiles on both sides.
- Dowels for drywall in the wall are located at a distance of 15 cm.
- Then set the profile in curved holes, previously cutting it. With the help of dowels, it is fixed to the wall, and self-tapping screws will help to firmly fasten the profile with drywall.
 Step-by-step instructions for installing drywall arches in an apartment
Finish
Having completed all construction work, the surface is treated with a primer. Various surface finishes are available. The presented photos prove the existence of a wide range. It could be, for example:
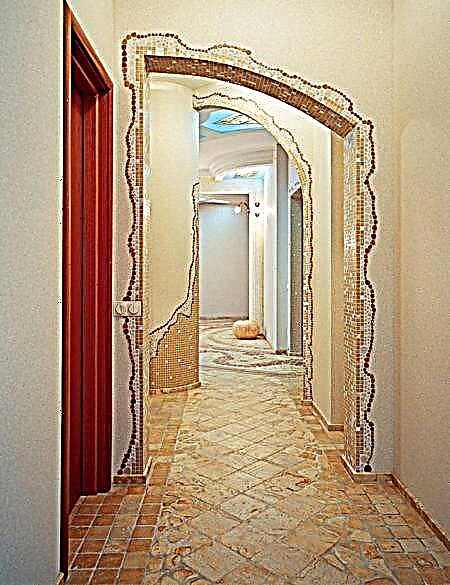
- stone finish
- gluing wallpaper on drywall,
- processing with decorative mixtures,
- classic version with stucco along the contour,
- the use of white veneer.
 Drywall Arch Finish
The first way will help to make the space elegant. In addition, such a variety does not require a flat surface.
Tips for using arches
Before installing the arch in a particular room, you need to carefully think through and weigh everything. If the design in the living room will help to make it more noble, then from the kitchen in this case, the smells and steam from cooking will freely penetrate into the room. However, for those wishing to equip such models in these rooms, there are some tips.
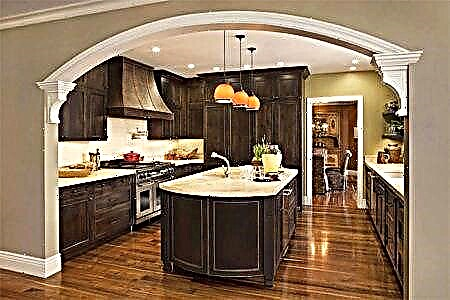
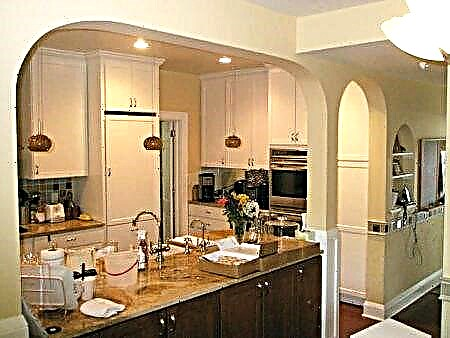
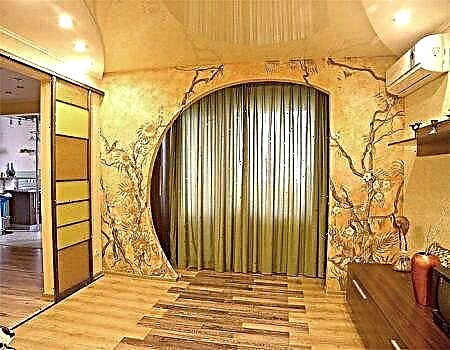
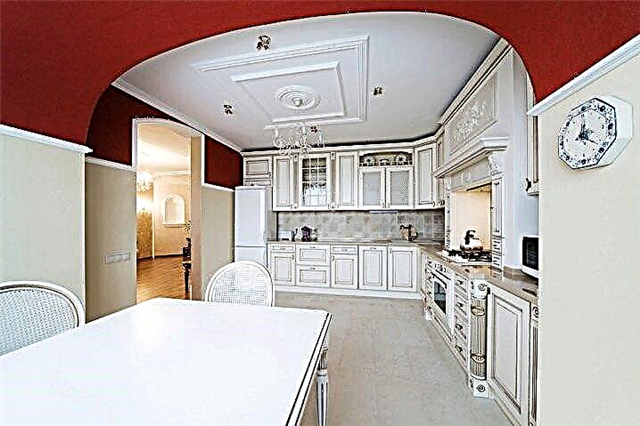
Arches in the kitchen
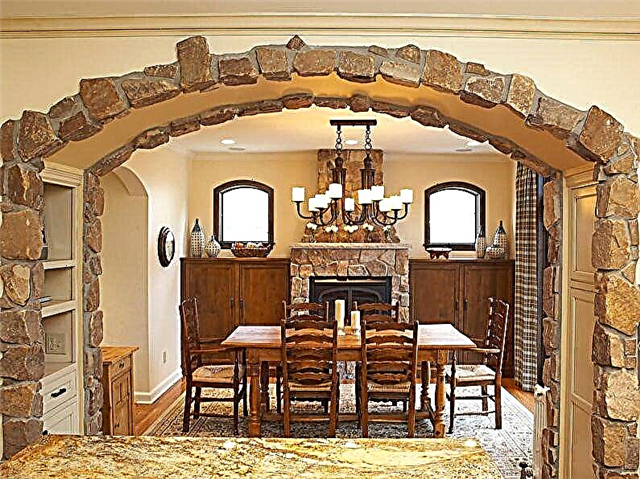
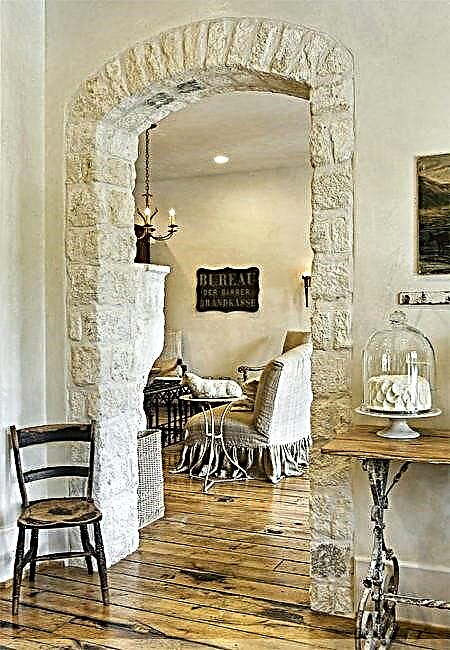
Here, designs fulfill more decorative purpose. Often in this case, a stone finish or its imitation is used. This option resembles the atmosphere of a medieval castle and is perfect for a country house.
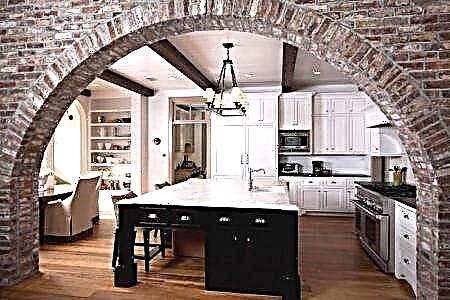 An example of finishing an arch in a kitchen with artificial stone
The finish will also look beautiful:
- wood carvings
- colored glass
- ceramics
- in the presence of several arches, it is rational to apply structures with columns of gypsum or wood.
When deciding on the location of the arch in the kitchen, you must not forget that this room requires frequent repairs, so the arched model should be decorated with universal decoration. In addition, to protect it from dirt, it is recommended to apply varnish. To isolate the room, you can hang a curtain or a thick curtain. Photos of the proposed arches in the kitchen will successfully help to decorate the interior of the room.
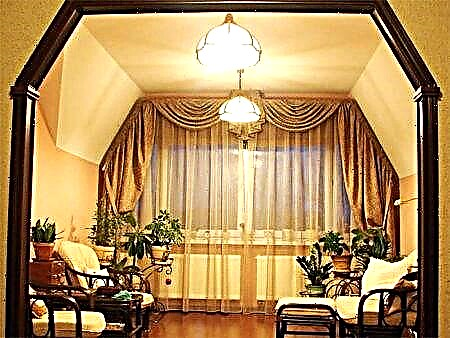
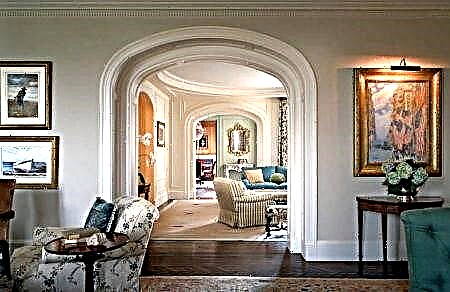
Arches for the living room
The passage from the hallway to the living room, decorated with an arched design, makes the interior elegant and luxurious.
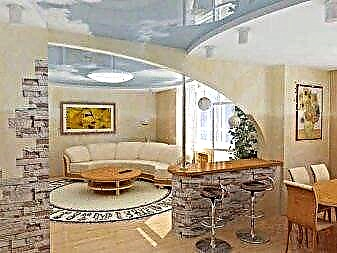
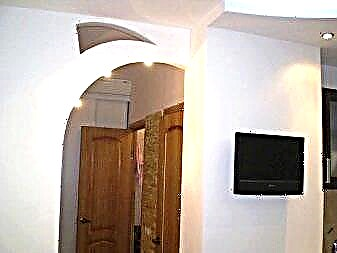
 Design options for arches for the living room
It is advisable to insert suitable lamps into the arch - this will enhance the effect of sophistication. In this case, there is no need to use expensive materials to decorate the arch. The main thing is that the decoration is combined with the colors of the furniture and the walls.With low ceilings, a similar model will help to visually increase them. Photos of arches with different designs perfectly demonstrate the arrangement of such an option.
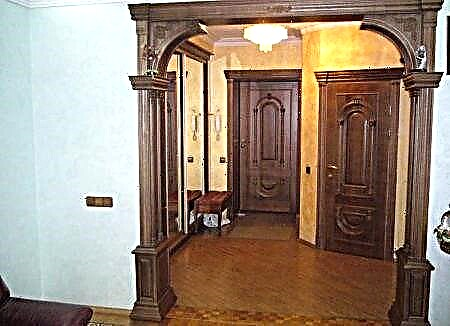
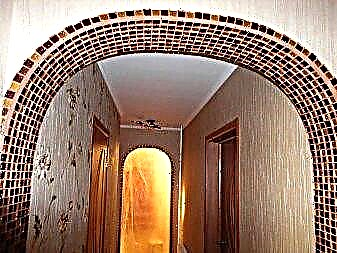
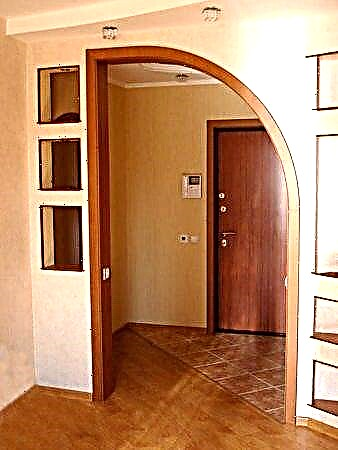
Arches for hallway and corridor
These premises in apartments are usually small. An arched passage will create a view of free space and decorate the interior of the room. If the corridor is too narrow, the design will help correct this situation and visually increase the area of cramped space. From the above it follows that with an arch model you can decorate any room or corridor in the apartment and house. Such an architectural component will make the room original, make it special and unusual.