Repair of a modern apartment is rarely dispensed with drywall. The alignment of walls, the installation of partitions or the formation of design refinements in the form of arches, curved niches, columns cannot do without this universal material. Drywall is inferior to classical stucco only in one thing: it does not "hold the punch" enough. A dent or hole may form under accidental circumstances or when it is planned, for example, to transfer outlets or hanging shelves to another location.
Therefore, an inexperienced master may have a question, how to seal a hole in a drywall on the wall? After all, the classical way of sealing holes in the plaster will not work here - behind the sheet there is usually a void or soft soundproofing material.
But do not worry that to eliminate the defect you will have to dismantle the damaged sheet as a whole, and buy a new one in its place. The technology for sealing holes in drywall is so simple that even a novice can handle it. Consider methods for repairing damage in order of increasing size.
How to close up holes up to 0.5 cm in drywall on the wall
Sealing holes in drywall left over from anchors, dowels, screws when moving furniture or shelves will not be difficult. To do this, you need acrylic sealant. It is squeezed into a recess and compared with a spatula to the wall plane. After drying, it will still have to be sanded with a mesh or sandpaper. And in the case of shrinkage of the glue and a small cavity in place of the hole, for the final disappearance of the defect, it is enough to apply the usual putty.
Through holes up to 3 cm
For repair you will need a minimum set of tools and materials:
- Sharp knife
- Sealant or PVA glue,
- Any material at hand to fill the hole. It can be crumpled paper or a piece of polystyrene left over from packaging of purchased household appliances,
- Putty,
- Sandpaper,
- Putty knife.
Before closing a hole in a drywall of this size, it is necessary to prepare the surface:
- They clean the edges so as to get a flat inner surface without crumbling pieces and rags of paper,
- Carefully pass with primer the inner edge of the cleaned hole and the area around at a distance of 5 - 10 cm,
- The prepared lump of paper or foam is greased at the edges with glue and cover the hole with it. It is necessary to ensure that the edges of the makeshift “cork” do not protrude above the wall plane,
- After the glue dries, the sealed hole is putty.

Further actions depend on the type of decorative wall covering: painting requires careful alignment, as the slightest flaw is noticeable on the painted surface. Therefore, you may need another layer of putty and thorough smoothing with fine-grained sandpaper.
Damage 3-6 cm
Repair of holes in drywall with a size of 3 to 6 cm or more is done using patches made from the same material. That's why you should not throw away the trim from drywall after repair - several pieces should be left just in case. Otherwise, you will have to ask friends of the builders who work with the GKL.
The easiest way is to cut a round hole in the damaged area with a drill with a drywall nozzle (crown). The hole is obtained with smooth edges.
Next, they begin to make the patch with all that “crown”:
- Cut a square with sides 4 to 5 cm larger than the diameter,
- From the wrong side, a circle is drilled, not reaching the front paper layer,
- With a knife, a chisel or any improvised tool, clean the plaster. The result should be a round liner with a square front of paper,
- The patch and surface of the drywall are primed, not excluding the inside of the hole and the ribs of the liner,
- After the primer dries, a plaster putty is applied to the edges of the hole and a patch is placed in the hole,
- The excess putty is distributed on the surface with a spatula, press the square part of the patch to the wall.
Further actions are puttying and finishing with decorative material using conventional technology.
Note: if there is no drill and special nozzles, the patch can be made square. To do this, you have to arm yourself with a pencil and a ruler so that the fragments match as accurately as possible.
Repair of large holes in drywall
Simple gluing of a patch is not suitable for large holes - there is a high probability of a glued fragment falling out. Therefore, before closing a hole in a drywall on a wall with a size of 10 cm or more, you will have to stock up on tools and materials:
- Screwdriver and / or drill,
- Screws
- Wooden block or shtaket,
- A piece of drywall of the appropriate size,
- Serpyanka,
- Primer, putty, putty knife.
First, a quadrangular fragment from GCR is cut out, slightly larger than the hole. By applying the patch to the damaged surface, mark the edges of the future hole. Then, drywall is carefully cut along the outlined lines. In order to prevent the seam from cracking in the future, the edges of the liner and holes are cleaned with a knife at an angle of 45 ° so that a groove of triangular section forms.
Next comes the turn of the frame for the patch: a wooden block (shtaket) is cut 5-6 cm longer than the hole and is pushed inside. Pressing it to the wrong side of the drywall, fasten the wooden frame with screws on the front side. The number of bars depends on the size of the hole - they should be enough for the fixed position of the liner.
Tip: For the convenience of working in the center or on the sides of the bar, you can screw the screws and wind the wire on them. Such an impromptu handle is then easily dismantled with a screwdriver.

After fixing the patch, the surface is primed. The joint seam is sealed with a serpentine and filled with base putty. After drying, impose a finishing putty and grind.
Repair of holes in drywall on the ceiling
The technology of the frame device for large holes in drywall is the same for both vertical and horizontal surfaces. Therefore, the question of how to seal a hole in a drywall on the ceiling, beginners will not arise.
If you don’t have a drill and a screwdriver at hand, but you still have a cylinder of construction foam from the repair, you can use it to fill a hole in the ceiling and form a stable base. Before filling the hole with foam, it is necessary to clean the inner edges of dust - this will ensure the adhesion of the foam to the inside of the drywall. After solidification, the foam is cut flush with the plane, putty. The method works on fragments up to 15 cm or with a small distance to the draft ceiling.

When closing ceiling defects formed by GKL soaking, it is worth remembering that before starting work, the ceiling should be thoroughly dried. Otherwise, mold will start under the drywall, which destructively affects health.
The listed methods are not the only ones possible. After all, drywall is a universal material that can work in an alliance with a wide variety of mixtures and solutions. How to seal a hole in a drywall? - ingenuity and imagination will tell the home master their ideas that will work no worse.
Good preparation is the key to success
It is not so important how the “unauthorized” hole appeared in your chic finish. Children were naughty, you yourself needed to cut a technological hole or the neighbors flooded. The problem already exists and now it is urgent to decide how, and most importantly, how to fix the hole in the drywall.
Do not worry, no exclusive materials, extra expensive tools or sky-high professional skills will be required from you, everything is quite simple and affordable.

Unexpected "gifts" from neighbors.
- Since we are dealing with drywall, it is easy to assume that it will have to be cut and processed somehow. For cutting, a standard construction knife and a hacksaw are usually used. With a knife, everything is simple, its price is cheap and it is better to buy it. Any hacksaw is suitable, but in such cases I usually use a blade from a hacksaw for metal, it has a fine tooth and the cut is cleaner,
- You can, of course, use the same construction knife to process and strip the edges.but a good result is not guaranteed. Therefore, it is advisable to have a planer on hand,

Standard set of plasterer.
- Although a file with a large tooth is more suitable for fine machining and adjustment, it’s good if there is a “jerking” (file for rough processing), because the small natfels are clogged with rhinestone dust,
- You will definitely need a pair of metal (wide and narrow) and at least one rubber spatula,
- You can of course do with a regular screwdriverbut still it’s more convenient to work with a screwdriver,

But before you close the hole, you still need to decide how you will close it. Naturally, the same material is best suited for drywall. Here you can regret throwing away scraps after repair.
Although do not be discouraged, a small piece of the sheet can always be found in any construction supermarket, and often for nothing, because for them it is just construction waste. At the same time, buy a serpentine mesh grid, it is better to take a self-adhesive, but if this is not found, then take a simple and PVA glue.
Several ways to seal holes in drywall
Depending on the size and shape of the hole formed in the gypsum plasterboard casing, various methods of sealing it can be applied: from filling with acrylic sealant or gypsum putty to the installation of a round or rectangular gypsum plasterboard insert. A small hole with a diameter of up to 0.5 cm can be sealed with acrylic sealant, but for other holes other methods will be suitable, which we will consider below.
Small hole 1-3 cm in size
It is easiest to seal such a hole in gypsum plasterboard using a starting gypsum putty. It is applied to the break point flush with the surface of the sheet and allowed to dry. After drying, this place is protected, covered with a layer of finishing putty and a piece of "sickle" or gauze is glued so that it overlaps the hole with a margin. On top of the "sickle" is covered with a layer of finishing putty and allowed to dry. After such a “patch” has dried, this place must be polished.
Sometimes, so that the location of the sickle does not rise above the plane of the sheet, before applying and puttying, the top layer of cardboard is carefully removed in that place.
For such a hole, another way can be applied. Crumple a blank sheet of paper so that it creates a kind of “cork” that fits tightly into the hole and does not protrude beyond the plane of the sheet. On top of the paper "cork" and in place around the hole, as in the previous case, apply the finishing putty with a "sickle". After drying, sand well.
The main methods of sealing
Defects in the sheet of drywall can appear, for example, when moving furniture or other interior items when bumps occur. The result is a hole in the wall. When such defects are formed, there is no need to panic, as there are ways to help get rid of such holes.
When repairing damaged areas, it is first necessary to consider their size. There may be a lot of reasons why such holes form, but they will not affect the process of eliminating them. Often, holes appear in walls more often than on ceilings.
There are only two ways to mask the holes in drywall. These methods differ only in that the first is used to conceal holes with a diameter of less than 15 cm, and the second is used for damage of large sizes.


In the first case, the hole can be repaired using special tools and materials. It is enough to put putty with a spatula on the reinforcing mesh, which is mounted on the site of drywall damage.
Close such a hole carefully so as not to damage another part of the surface of the material.
In the second case, a plasterboard patch is used, which is cut and installed in a damaged place.


Tools and materials
Before damaging plasterboard damages, make sure that you have the following tools available:
- construction knife
- centimeter,
- pencil,
- putty knife,
- sandpaper
- drill for stirring solutions.

As materials suitable:
- self-tapping screws
- wood block,
- reinforced mesh
- drywall sheet,
- putty.
- gypsum.
Please note that in rooms with high humidity, only a moisture-resistant coating must be used.. With all of these tools and materials, you can easily repair even the largest holes yourself.
But before you begin to perform work, you must carefully prepare the surface of the wall.

Surface preparation
First of all, in order for holes to no longer appear, it is necessary to get rid of the cause of their occurrence. For example, if there is any movable furniture (for example, a rocking chair) near the wall, a hole will appear constantly.
In the damaged area there should be no hanging edges of drywall. Therefore, it is first necessary to clean the hole of various debris, since dust residues and gypsum pieces can significantly complicate the repair of damaged areas.

Then you need to dilute the gypsum solution in a certain sequence:
- Pick up a bowl of warm water.
- Pour the gypsum mixture into the water in the required proportion (the instructions for preparation are indicated on the packaging of the material). It is not recommended to pour water into powder, otherwise a large amount of sediment may result. Ready-made mixtures can also be used.
- Mix the mortar with a construction mixer to a thick consistency.
Now we proceed directly to the elimination of damage.

Minor damage
Each specialist in the installation of this building material will be able to fill a small hole in a drywall. But even during repairs, various minor damage often occurs. If there are cracks in the wall, then it is necessary to slightly expand them with a construction knife.
In the event that the hole arises from contact with water, it is no longer possible to restore it, so the wet areas are completely removed up to the solid base.
If a minor hole was formed during the operation of drywall, then its termination is performed in the following sequence:
- in place of the hole, a reinforcing mesh is glued to the surface of the material,
- after the glue dries, putty is applied with a spatula,
- after the first layer of putty has hardened, you need to repeat the action, but with the application of gypsum mortar in the area where there was damage,
- Grouting this surface is carried out only after the solution has completely dried.


In this way, any minor damage can be repaired so that there is not the slightest trace left of it. But how to eliminate a large hole, because a light mesh will not withstand a thick layer of gypsum mortar?
If we apply the method described above to seal a hole larger than 15 cm, then with a sagging reinforcing mesh, it will be very difficult to align the damaged section of the wall.
In order to repair such damage, it is necessary to make a patch from a correctly selected plasterboard piece.

Big holes
The process of eliminating large holes takes place in several stages:
- A rectangle-shaped markup is drawn on the surface of the damaged area. The length and width of the geometric shape should be slightly larger than the parameters of the hole or other unsuitable surface areas.
- With a construction knife, a hole is cut out according to the marking, the edges of which grind at an angle of about 45 degrees.
- Next, on a pre-prepared gypsum board piece, a rectangular figure is drawn that corresponds to the parameters of the cut section.
- With the help of a construction knife or saw, a patch is carefully cut out, its edges are also sharpened.
- Next, wooden bars are taken. Their length should be greater than the diameter of the hole in the wall by 3-5 centimeters.
- The bars are inserted from the back of the hole and attached to the sheet with screws. They will serve as a kind of emphasis so that the patch does not fall inward.
- The edges of the holes are covered with a thin layer of plaster or putty, and the patch is carefully inserted inside. For a stronger fixation, the patch can be screwed to the bars with screws.
Final finish
Sealing a hole in a drywall or holes in other areas is not difficult.
After eliminating this problem, it is recommended to complete the finishing of the repaired areas:
- The working surface is covered with soil and left to dry completely.
- Prepared putty is applied to the site using a spatula. First, all irregularities and seams are separately smeared, and then the final layer of putty is applied to this area as a whole. Putty surface is left to dry completely.
- Using the emery paper, the restored surface is ground and smoothed. This completely removes the excess putty.
- The area where the hole was located is pasted over with wallpaper or covered with other material so that the surface finish does not differ from the background of the undamaged place.
As a result of the work done, the damaged surface will be completely restored.
See how to fix a hole in drywall with your own hands in the next video.
Step 3: Assembling the Tool

After you select the crown of the right size, you will need to install it in the holder-holder.
All crowns are slightly different, but most have a nut that needs to be unscrewed before being put on the holder. For my crowns, the holes are made for the asymmetric shank of the holder, and they must be put on the holder until they stop, before tightening the nut.
Since the crowns are cut in the same direction as the cutting edges of the drill, there is no need to tighten the nuts - they themselves will twist during the drilling process.
Crack repair
Most often, cracking of drywall sheets is observed in new apartments. The reason is the shrinkage of the walls and supporting structures. You can solve the problem as follows:
- If the crack is small, then it is slightly deepened.
- A special putty for drywall, used to process the joints, cover the recess.
Important! In the case of deep cracks, fiberglass is used as the reinforcing material.
- Then the surface is ground and the finish is continued.

Preparatory stage
To close a hole in drywall is not necessary to have professional skills. Before starting any business, especially if it concerns repair, you need to carefully prepare for the process. Good preparation is already half the success.


As a rule, a hole that unexpectedly formed in a wall requires some cutting and processing. This can be done using the most ordinary knife, which is designed for construction work, or you can safely use a hacksaw. Choosing a hacksaw as a tool, we recommend taking a tool with small teeth. This is usually a hacksaw for metal. The smaller the teeth, the easier it will be to make the right cut, the edges of which will then not have to be cleaned for a long time.
After the cutting process, the edges require processing. This can be done with the same knife for construction work. You can also use a file that is designed for rough processing. Small files are also suitable, but it is worth remembering that they quickly become clogged with dust from drywall and will not work comfortably. Or you can use sandpaper.


Having completed the preparatory phase, namely, having prepared the hole itself for sealing, you need to decide what exactly you will patch the hole with. The ideal option is a piece of drywall. By the way, after repairs it is advisable not to throw away residues and scraps. As you can see, they may well come in handy.
In addition, for subsequent repairs, namely for repairing damage, you will need the following items: a simple pencil, a ruler, a construction knife, a spatula, sandpaper, slats, screws, putty and drywall itself.
Step 4: Making a Plywood Stencil

In order for the crown not to jump over the drywall at the time of cutting, we need some kind of barrier that will help to make a flat edge of the hole. I made such a barrier out of plywood.
Plywood can be of any thickness, since it is needed only to keep the crown in place when cutting drywall.
DIY hole repair in drywall
A hole in drywall can form from shock or wetting. The largest damages require serious repairs. Regardless of the cause of the hole, it is necessary to start repairing it immediately.

Step 5: Cut out the damaged section of the wall

Attach the plywood stencil to the wall so that the area with the hole is in the hole in the stencil.

Hold the stencil firmly against the wall. Insert the crown into the hole and start drilling at low speeds, the stencil will help keep the center.

Continue drilling until you cut through the thickness of the drywall sheet. A hole with even edges will remain in the wall, and a fragment with a hole will be inside the crown.

Remove the template, crown and remove any burrs from the edges of the hole.
Creative attitude
Works like fixing a hole in drywall do not have precise recommendations, no detailed instructions for such works have yet been written. Here the wit and creativity of the master himself decide a lot.
Helpful advice ! It goes without saying that the thickness of the patch should correspond to the thickness of the drywall sheet. If you didn’t manage to find a suitable piece, you can play with the patch size.
The rules here are:
- if the thickness of the patch corresponds to the thickness of the sheet on the wall - the size of the patch should be exactly equal to the external size of the hole,
- if the thickness of the patch is greater than the thickness of the sheet, the patch must be smaller than the outer size of the hole (to go deeper inward),
- if the thickness of the patch is less than the thickness of the sheet, the patch should be larger than the outer size of the hole (to prevent it from “going inside)

The right tool selection and handling skills will be crucial
Most likely, the mother of “Uncle Fedor never picked up trowels, but she also found a solution to the problem with a hole in the wallpaper. Think about it, maybe a hole is a good reason to close it with your favorite photo.
If you still decide to fix the problem in principle, then go to work thoughtfully. Decide for yourself which method of getting rid of the hole is best for you, and get to work with a cold head.
Note: if there is no drill and special nozzles, the patch can be made square. To do this, you have to arm yourself with a pencil and a ruler so that the fragments match as accurately as possible.
- Sharp knife
- Sealant or PVA glue,
- Any material at hand to fill the hole. It can be crumpled paper or a piece of polystyrene left over from packaging of purchased household appliances,
- Putty,
- Sandpaper,
- Putty knife.
The task - how to close up a hole in drywall, as a test of the skill of the tool and quick wit
Of course, we always want to do everything with a bang, without a hitch, without a hitch. It’s beautiful, fast and forever, but life constantly brings surprises: either the profile is shorter than the necessary, then the color does not match. In repairs, it is always necessary to be prepared for emergency situations and to come out of them with honor.
This skill is a real test of skill and ingenuity. One of such situations when working with drywall is the appearance of a hole on the sheet surface, the causes of which can be very different, but the essence is the same. The problem arises of how to close up a hole in drywall, the solution of which will be a test of ingenuity.

At the end of all the work, the places of the previous holes will seem just places of technological fastening of drywall, putty will hide any cracks
Step 7: Cut out the patch

With a sharp clerical knife, cut the area with the insert. Take your time, make a few shallow cuts until the knife passes through the drywall.

The patch area should be about ten centimeters around the insert.

Make radial cuts from the edge of the insert to the edges of the piece of drywall. The incisions should not be deep enough so that the gypsum layer can be broken by hands.

Carefully break the gypsum layer along the notch line and disconnect the pieces of gypsum, carefully separating it from the bottom layer of paper so as not to tear it.

If you did everything correctly, you should have an insert with a paper "skirt."
It turns out almost according to Suvorov - it was smooth on paper
And you should not even go into the causes of the hole - whether you needed a technological hole, whether children threw darts, or is it a trace of a plate from which you successfully dodged. Now it doesn’t matter. It is necessary to start repair.

This is a very common situation - the opening angle of the door is not provided for a bit, the emphasis is not put at the bottom, a sharp push and a punch of the handle causes such an incident
The first thing that needs to be decided is how to seal a hole in the wall with drywall and which method to use.
You have the following action algorithms at your disposal:
- you can put a patch directly on the processed hole, putting it on gypsum, on top it is permissible to additionally fix it with adhesive tape, putty and paint according to the color of the wall,
- if the drywall sheet is close to the wall, and the hole is large enough, then the prepared patch can be additionally fixed directly with a screw to the wall, and then again the gypsum, putty and painting,
- There is another way to seal a hole in drywall - insert a prepared piece of drywall or plywood inside the hole and fix it with screws on the outside. This piece will not let the patch fall inside and will be an additional, and very reliable, means of fixing the patch.

And this is only one way of fixing the patch, here your ally, in any case, will be smart
Step 9: putty on the edges of the hole

Open the can with universal putty and mix gently. Apply a generous layer of putty with a spatula to the edges of the hole and to the surface around it.

Make sure there is enough putty inside the hole to fill the gap from the crown body. When you put the insert into the hole, it will squeeze out any excess putty inside the wall, where they will not be visible, so do not be afraid to overdo it.
Step 10: Insert the Insert into the Hole

Carefully grab the patch by the edges and turn the liner to the hole.

Gently push the insert into the hole until its surface aligns with the surface of the wall.

With a spatula, smooth the patch with movements from the center to the edges to expel the air and firmly press the paper "skirt" to the wall. Put all putty gathered on the putty knife on the center of the patch and continue to smooth it.
Damage restoration in the form of drywall holes
- pencil,
- metal ruler
- drywall knife,
- putty knife,
- sandpaper,
- electric drill with nozzle for stirring solutions.
- measure using the ruler the size of the hole. It is necessary to measure not only the hole itself, but also all damage on the plate. This is especially necessary if the cause of the defect was the fall of a heavy object (cabinet, table, etc.),
- apply marking with a pencil and a ruler to the damaged wall. We start marking up only from the corners, and not from the middle,
- put the sheet on a high horizontal plane. It’s better if it’s a table,
- we cut the top layer of the plate,
- then turn the sheet over and do not hit it hard with the fist in the place of the incision. As a result, the plate will break,
- cut the remaining cardboard layer and get a piece with perfectly even edges.
One of the most popular materials in modern repair is drywall. But it has one drawback, which is its low strength. And, unfortunately, situations are not uncommon when, upon impact, furniture falling, etc., appear in a drywall holes. This situation can also occur when trying to hang a cabinet, shelf or wall when installing a chandelier in the ceiling.
Regardless of the location of the hole (on the ceiling or wall), the order of work determines the size of the hole.
Elimination of small-sized holes involves the following actions:
Step 11: Add Putty

Put more fillers on the patch and spread with a spatula evenly on the surface.

You need to make the transition to the wall surface as inconspicuous as possible. I got the best result when smoothing the putty first with movements from the center to the edges, and then from the edges to the center.
When the patch and, more importantly, its edges are completely covered with putty, let it dry completely. I left the patch dry all night before proceeding with the next step.
Step 12: Processing the Patch with Sandpaper

When the putty is completely dry, you will need to process it with sandpaper. If you start to process the dry putty, it will leave in pieces.

Start processing from 120 grit, and change the paper number to 200 grit. Remove all marks from the putty knife, all the protrusions of the putty, the transition from the patch to the wall must be made as invisible as possible.
After you finish sanding the patch, remove all dust and possible bullying.
Step 13: Paint

We cover the patch with paint of the same color as the wall. It is most convenient to paint the walls with a roller, not only because of speed. The roller leaves behind a more even and smooth finish than the brush.

If you are trying to seal a hole in a drywall near a power outlet or switch, it is best to first remove the front panel or cover it with masking tape so that the paint does not accidentally get into it. The time spent on polishing was not in vain - in the photo you can hardly see the place where the hole used to be.
How to seal a hole in drywall: useful tips
First you need to study the size of the dent itself. If it is insignificant, it will be easier to polish it carefully. But if the hole is quite large, a full repair is needed. Step three. Drywall must be cut with a special knife prepared in advance.
Cutting is important along the contour. This action will require physical effort. The result should be a patch.
- Inspection and analysis of the hole,
- Elimination of the causes of its occurrence, if the sheet is damaged by wetting, eliminate the source of leakage and wait until the drywall is completely dry,
- Measurement of the damaged area, taking into account all chips, scratches and cracks,
- Preparation of materials and tools for its elimination.
These small tips should help you repair unexpected drywall damage. The question is how to seal a hole in drywallshould no longer arise. The described process is suitable for all types of holes, wherever they are - in the wall or on the ceiling. The main thing for the contractor of such repairs is to show attentiveness and thoroughness at every stage.
All surfaces must be thoroughly cleaned and primed. Materials use proper quality.
3-6 cm hole
It is easiest to seal such a hole with the help of a “patch” cut from a piece of drywall. It can be round or rectangular. The easiest way to make a round. It can be done using a nozzle for a drill - a “crown” for drywall.
First, with the help of a “crown”, a round hole is cut out at the place of the hole, and then the same “crown” is cut out of a patch of a suitable piece of drywall - it should be larger than the hole.
For a round patch, we pre-cut a rectangular piece of drywall, mark its position on it, and then use the nozzle to cut out so that only the bottom layer of cardboard and gypsum are cut out. The top layer of cardboard should remain intact. Using a hand tool, we clean it of gypsum outside the circle.
We put a plaster putty on the ends of the holes and around it with a spatula and insert the prepared “patch” and press the cardboard layer with a spatula.
We putty everything on top, let it dry and grind it.
In this way, you can make a rectangular “patch”, but you have to cut it out manually already.
If the hole is large (8-10 cm or more)
In this case, you can’t do without mounting under the “patch” of a rigid base - a wooden bar (s) or a metal profile to which it can be attached. If the hole is 8-10 cm in size, then one wooden block will be enough, longer than the size of the hole.
The hole is first given the correct rectangular shape, chamfering along the edges. In order to keep the bar in the right position, a self-tapping screw is pre-screwed into it. The block must be inserted into the hole and held by this self-tapping screw, attached to the sheet with the help of two other self-tapping screws, screwing them from the outside.
When the block is fixed, the self-tapping screw for which it was held is unscrewed. By the size of the hole, a “patch” is cut out of the drywall piece, which is fastened with screws to the bar. Self-tapping screws need to be drowned somewhat in drywall (1-1.5 mm), but so as not to cut through the top layer of cardboard. From above, the entire surface to be repaired, joints and fastening points with screws, are putty. The contact points of the insert and the sheet are reinforced with a serpentine. After the putty has dried, grinding is carried out.
Instead of a wooden bar, you can use a metal profile.
If the hole in the drywall is even larger, then to seal it will require not one bar or profile, but several.

They can be arranged in different ways: along the edges, as in the picture, or along the edges and in the middle, as in the photo below. The bars or profiles are attached to the edges of the sheet so that a patch can also be attached to them. In the future, as in the previous case, the joints are closed with a sickle and the entire surface is putty.


These simple methods can be used to seal a hole with your own hands, which is formed in drywall on a wall or ceiling.
Materials and tools for removing holes
Tools for plastering.
To eliminate the large hole in the drywall wall, you will need to purchase several tools:
- A simple pencil can be found in every home, especially where there are children.
- Wooden ruler. Metal is quite suitable.
- A special knife that cuts drywall.
- The so-called knife-saw on drywall is extremely necessary.
- Self-tapping screws. About 10 pieces. It all depends on the size of the damage in the wall.
- Putty knife.
- Hacksaw on wooden materials.
- The usual plastic container that will be used for putty.
- Screwdriver. A regular electric drill is also suitable for its replacement.
- Dry wood bars.
- Fiberglass Tape
- A sheet of drywall, which in size will be larger than the damaged area in the wall.
- Putty.
- Plain PVA stationery glue.
Do not be afraid that there are so many materials. At first glance, everything may seem very complicated, but this is a fallacy.
How and what to repair seams on drywall: rules for choosing the tools necessary for the work
Not a single grout of joints can do without such a necessary tool as a spatula. Each master chooses to work, such a spatula, which is convenient for him. It is more convenient for someone to cover the seams with a narrow tool, and for someone - with a wide one. This is not the point
The most important rule to consider when choosing a putty knife is blade flexibility. Advantages of the tool with a flexible blade - ease of handling hard to reach places
Many masters use only the finish to seal the seams. Of course, when processing joints with a finishing putty mixture, the work will be completed much faster, but then there are risks of the formation of huge gaps between the sheets of drywall.

In order for the joint joints to be very durable, it is better to use special varieties of putty. Especially, this applies to those cases when the surface of the drywall sheet, in the future, will be painted. If it is planned to cover the surface of the gypsum plasterboard with paint, the joints should be filled with a special solution designed for these purposes.
Today, there are two types of putty, used for grouting:
- Universal - start and finish.
- Special, based on alpha gypsum. Among the most famous brands, I would like to mention gypsum putty by the Knauf Rothband.
In addition to a putty knife and putty, you should take care of the acquisition of:
- Paper tapes or reinforced nets used for gluing seams,
- An electric drill equipped with a special nozzle designed to mix the putty mixture,
- The special packaging that is needed to prepare the putty,
- The corner. Sealing joints will be better
- Sandpaper. It is useful for grinding joints.
If, however, it is planned to wallpaper the drywall, then there will be plenty of start or finish putty, since the texture of the wallpaper can cover small defects located on the walls.
Close up of small holes
Each master in the installation of drywall sheets knows how to close a hole in a drywall of small diameter. During installation, such damage is not uncommon, especially when the screw is too tightly tightened with a screwdriver. If a small hole was formed during the operation of the wall, then its closure is carried out in the following sequence:
- In the place of damage to the material, a small piece of a serpian net is pasted,
- When the glue dries, a thin layer of putty is applied with a spatula,
- After drying of the first layer, it is required to repeat the operation with applying the working solution to the place where there was a hole in the wall,
- After complete drying, wipe the material in the place where the hole was sealed.

This way you can close any small hole, but how to close a hole in a large drywall, because the thin mesh will sag under the mass of the solution? If you use the above method to seal a hole whose diameter exceeds 10 cm, then with a sagging reinforcing base it will be impossible to level a large section of the wall. To close up a large hole, repairs are carried out using a patch from a properly prepared piece of drywall.
Drywall Repair
Regardless of the circumstances in which a hole was formed in the plasterboard wall, the measures for its repair will be unchanged. In order to close a hole in a drywall, we need the following hand tool:
- Metal or wooden ruler
- Drywall knife
- Manual drywall knife-saw
- Self-tapping screws up to 10 pieces (depending on the size of the damage)
- Hacksaw for wood
- Plastic putty container
- Putty knife
- Electric drill or screwdriver
- A sheet of drywall having a size larger than the damaged area in the wall
- Wooden dry whetstones
- PVA stationery glue
1 - At the first stage, it is necessary to measure the damaged area of the drywall with a ruler. It is necessary to measure not only the hole itself, but also the entire deformed area of the wall. For reinsurance, you can throw 3cm of stock on each side.
2 - Next, transfer the resulting dimensions to a new drywall sheet. Dimensions must be marked from the corner of the finished sheet, and not from the middle, so that there is less waste.
3 - Cut the marked drywall sheet on a previously prepared surface with a special knife on drywall. To do this, first apply smooth borders with a knife, and then, applying the efforts of the hand, the desired piece-patch is cut off.
Grinding the finished ceiling
The last step in the processing of seams is their grinding, or sanding. It is made with an abrasive mesh or sandpaper grater. This can only be done after the putty has completely dried. It is recommended that you illuminate the surface with a spotlight or a lamp to see the smallest irregularities that can affect the appearance of the putty on the entire ceiling.
Another putty mixture JS weber vetonit. It is a polymer composition having a strong adhesion to a drywall surface.
- The remaining pebbles from the mixture will interfere with subsequent work and may eventually ruin the appearance of the room.
- Grouting must be done to achieve a smooth surface.
The choice of tool and filler mixture
Putty joints of drywall is done with a spatula, which means that you have to choose it. There are no special recommendations when choosing them. In this case, your personal preferences are more important, which should be taken into account when choosing a spatula.
The main thing is that he bend well enough, and everything else is not so important. If it is more convenient for you to use a wide spatula, then take it, if it is narrow, then do not hesitate and choose a narrow
The choice of material that will be used to seal the drywall joints must be approached very responsibly, otherwise they will just start to crumble, for a long time poor putty will not stand it. In the case when you will close up the drywall seams, it is better to stop the choice on the finishing putty from the Knauf company, which may have a price slightly higher than other similar materials, but it has passed all the necessary tests, due to which its manufacturer has proved its durability . Of course, you can use the starting putty, but it is not particularly suitable for puttying joints, so if you use it, then only if then wallpaper will be glued to this surface.
How to expand the crack?
Before closing a crack, it must be expanded. This means that with a spatula, knife or chisel, you need to scrape the filler to a drywall sheet and increase the crack in width to 5-10 mm. As a result, you can easily remove all poorly-kept and crumbling putty particles. If in the process of crack expansion it turns out to be wider than 10 mm - this is not scary. All that falls off is best removed immediately, so that a new hole does not appear next to the already patched.
On the edges of the embroidered crack within 1-3 cm, it is necessary to remove the paint. This can be done with a knife, putty knife, chisel or sandpaper. Such cleaning will help a new layer of putty to firmly fix on the surface.
Before closing the seam, it must be brushed with a brush or a broom to get rid of all particles of remaining dust. After that, it is treated with a primer and left to dry completely. The primer can be used with any brand, since a fairly large number of companies are engaged in its production, therefore this building material is usually of good quality.
 To expand a crack in the drywall in the ceiling
How to seal a hole in a drywall wall
To the list of tools and materials that are used to seal small holes, you will have to add a larger spatula and fine plaster. But instead of it (in case of absence), you can use any of the gypsum building materials listed above. If necessary, apply the second - the final layer of putty and process it with an abrasive as it dries. After that, the wall can be wallpapered or painted. With a tool, the hole is measured.
After that, draw a similar figure on the spare piece of drywall. It is advisable to cut off the edges of this figure at an angle of approximately 45 degrees. This is where the correct hole shape comes in handy, so it’s easier to draw. Who did not bother with the alignment - circle the hole on the paper, and then transfer to drywall. Not all of the above will need to be used, but it is better to play it safe than to frantically go shopping or beg around the neighbors.
If the hole in the drywall is from a self-tapping screw or nail, then you only need a spatula, putty, sandpaper, a pair of hands. Dilute, coat, let dry, clean - done.
The nuances of fixing holes in the walls before wallpapering
Wallpaper decoration is the key to the cosiness and beauty of the room. Gluing wallpaper on an uneven holey surface is a problematic task. How to cover holes in the wall so that the wallpaper fits correctly and mask the damaged areas?
The answer is simple: the materials used are the same. Putty or special repair compound. The restoration process differs only in that the end of the elimination of the defect is the finishing finishing, performed with the help of tools for leveling the surface. If all the actions are performed correctly, the result will please the eye. The surfaces will be smooth and neat, without any irregularities, which will allow the wallpaper not to tear after gluing.
 The end of the elimination of the defect is the finishing finishing, performed using tools for leveling the surface.
Plasterboard Holes
If the hole in the gypsum plaster sheet has a diameter of more than 10 cm, then in this case a patch is cut out from a drywall sheet, which has a thickness similar to the wall, and installed in place of the damaged area. As already noted, if the hole exceeds a diameter of 10 cm, then in the damaged place a piece of plasterboard sheet of suitable thickness and size is necessarily set. The whole process to eliminate such damage is carried out in the following sequence: Work to remove hanging edges should also be performed before repair work begins.
It will only be possible to reliably attach a reinforcing mesh or a piece of drywall cut to the size of a hole only to a quality machined surface.
- In the place of damage to the material, a small piece of a serpian net is pasted,
- When the glue dries, a thin layer of putty is applied with a spatula,
- After drying of the first layer, it is required to repeat the operation with applying the working solution to the place where there was a hole in the wall,
- After complete drying, wipe the material in the place where the hole was sealed.
Depending on how seriously damaged the plane of the building material, the question is solved, what can be done to seal a hole in drywall. A hole in the wall can be easily eliminated with a spatula and gypsum mortar.
Additional information on the topic:
- How to make drywall wall from stone
- How to better align the walls with drywall or putty
- How to plaster adobe walls inside a house with drywall
- Drywall partition with integrated compartment doors
- How to glue ceramic tiles on drywall video
Necessary tools
If the hole in the drywall is from a self-tapping screw or nail, then you only need a spatula, putty, sandpaper, a pair of hands. Dilute, coat, let dry, clean - done.
If a huge hole gapes, the list of tools is much more impressive:
- Pencil for marking. Even a nail would do, just to see the mark.
- Ruler, tape measure, even a simple thread - for measurement.
- Special knife for cutting drywall. An ordinary hacksaw is fine.
- Putty and putty knife.
- 2 pieces of wooden battens, slightly larger than the holes in size.
- Several screws, screwdriver or screwdriver. They may not be useful, but let them be.
- Streaks of thick paper, gauze or special tape - serpyanka.
- A piece of drywall. Better a few. Slightly larger than the hole.
- PVA glue.
- Enthusiasm and desire to work a little.
Not all of the above will need to be used, but it is better to play it safe than to frantically go shopping or beg around the neighbors.
Stage number 1. We put a patch
At the first stage, it is necessary to determine the area of damage to drywall and evaluate its condition. If the hole was formed as a result of getting wet, then it is necessary to identify the limp places. When a hole appears as a result of an impact, the region of crack propagation is determined.
- Finding weak spots around the hole, they are removed. To do this, using a ruler and a pencil, draw a rectangle around the hole, within the boundaries of which there is a cracked or wet area.
- Using a knife, cut out the damaged element of GCR.
- The perimeter of the cut hole is ground at an angle of 45 °.
- Next, a rectangle is drawn on the drywall blank corresponding to the size of the cut piece. Its edges are also cut off at 45 °.
- Using a knife or a special file, a patch is cut out exactly along the contour.
- Wooden bars are measured. Their length should be 4-5 centimeters longer than the hole on the drywall.
- The bars are inserted into the hole, fitted to the back of the drywall and attached to it using self-tapping screws. The bar should be fastened both in the upper part and from below. For the convenience of work, the bars are held by hand on the back side. The result should be a kind of crate.
- A prepared patch from a piece of drywall is drilled to a crate of bars.


Preparatory work and tool
Regardless of the method used to carry out the termination work, a series of identical preparatory work is carried out, which includes:
- Inspection and analysis of the hole,
- Elimination of the causes of its occurrence, if the sheet is damaged by wetting, eliminate the source of leakage and wait until the drywall is completely dry,
- Measurement of the damaged area, taking into account all chips, scratches and cracks,
- Preparation of materials and tools for its elimination.
As a construction tool and additional materials are used:
- Ruler or building level and pencil,
- Drywall saw or stationery knife,
- Screwdriver and screws,
- Putty knife and putty (plaster),
- Container for preparing plaster,
- Wooden bars and a hacksaw for wood,
- PVA glue and serpyanka tape,
- Drywall sheet.
Two ways: how to close a hole in drywall
If a hole appears in the drywall construction, there are at least two ways to eliminate it. These methods can be used on the ceiling and on the wall. Choose the simpler one for you.

How to eliminate a hole in the GCR:
- If the hole is small, you will have to use a syrup, putty, and all this in several stages.
- If the hole is large, you will have to make a patch of drywall. The perimeter of the patch should be six centimeters larger than the hole.
Of course, holes appear in the wall much more often than on the ceiling. This fact should be taken into account even at the stage of preparation for the installation of drywall construction.
It doesn't matter what caused the hole in the drywall. Masking technology will still be unchanged
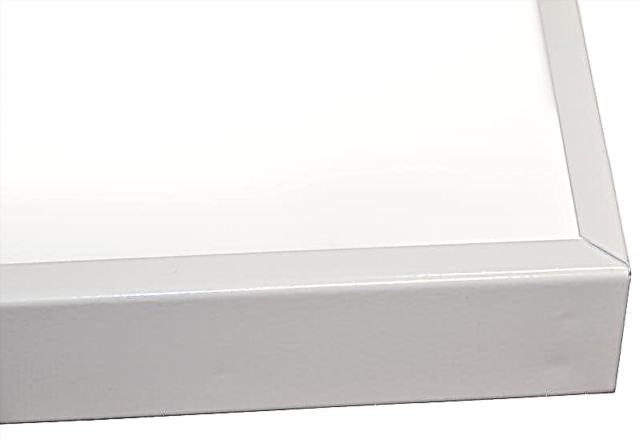
Drywall and Rothband, compatibility test.
Many have heard such terms:

However, professional builders usually call this element a fillet (it’s also the bar covering the joint between the wall and the ceiling). There are many materials from which this decorative element is made. This can be a classic plaster stucco molding (there are workshops that still do it manually), and wood, and modern plastic fillets, and even luxurious marble.
Mounting methods differ depending on the material. If plastic parts are glued, then wood, gypsum stucco and other heavier materials are attached to nails or screws.

Ceiling fillet
A few words about the repair of plasterboard ceilings
Perhaps, many are familiar with the situation when the surfaces of walls and ceilings are corrupted as a result of flooding by neighbors from above. In this case, it is rarely possible to solve the problem by installing a patch, most often you have to change the entire drywall.

Repair can be much cheaper if, at the time of detection of a leak at the lower point of the suspended ceilings, a pair of holes for moisture exit are made. Their further disguise will take no more than 30 minutes, while the entire ceiling does not have to be changed. If the water has affected a small area of the hinged structure, it can be restored using any of the above methods.
How to seal a hole in the ceiling
How to seal a hole in a wall from drywall, is described in detail in this article, but many home masters are interested in the question: "How to close a hole in a drywall on the ceiling?"
The closing of a hole in drywall on a horizontal plane is practically no different from the above methods. Some difficulty in performing such an operation may arise in the case when a very large hole is closed. Due to the fact that a large patch will have a significant mass and, under the influence of gravity, it will be difficult to keep it with a gypsum mortar, it is recommended to completely remove part of the drywall sheet from one profile to another and replace it with a similar sized intact material
Despite the fact that the ceiling is less susceptible to various damage, work at heights will require great effort and caution. If the ceiling has a damage of not more than 10 cm in diameter, then termination is carried out using a reinforcing mesh and drywall
In this case, the edge of the hole is smoothed out, and the mesh should have a size slightly larger than the hole made in the ceiling.
Ways to mask holes
Today, when a hole appears in drywall, it can be repaired in several ways:
- the method used for small holes. Used if hole diameter is less than 10 cm,
- closing a large hole. It is used if there is a hole with a diameter of more than 10 cm.
Both methods are used both on the ceiling and on the wall. It is worth noting that in the wall, for a number of natural reasons, holes appear much more often than on the ceiling. Moreover, in addition to the size of the hole formed, the choice of the method is not affected by the way in which the hole appeared. The technology of masking the hole itself will remain unchanged.
How to cut drywall?
As a result, you need to get an even piece, but cutting it is really difficult. What to consider? So, you need to start with two marked lines with a pencil on the sides. In these areas, deep incisions are made. Next, the excess section is cut off. Now you need to hold the main sheet of drywall with one hand, and gently lift the area marked with a pencil with the other hand. As a result, the middle of the drywall will break perfectly evenly.
How to cook putty?
In this case, it is very important to observe all proportions. The process is a bit like cooking
If you add too much salt, it will not taste good. If you overdo it with one ingredient, then the putty mixture will not work. So, in a plastic container you need to pour water and add the mixture to it. It is very important to do not the other way around. Otherwise, an unwanted precipitate forms at the bottom of the tank. Next, prepare it according to the instructions on the package, which is written on each bag with the mixture. And you can mix this solution with a special nozzle from an electric drill.
These small tips should help you repair unexpected drywall damage. The question of how to seal a hole in drywall should no longer arise.