In general, it is difficult to imagine any kind of repair without filling the walls, which is simply necessary to prepare the surface for finishing work, including wallpapering the walls. But which is the best putty? The lexical meaning of the word putty or putty (the options are equivalent in use and true) is not important, the procedure will allow you to align the walls, cope with the roughness of cracks, leveling with roughness, create a smooth surface. It should be borne in mind that some wallpaper options are not able to be mounted on a wall surface that has not yet been puttied in advance. Wallpaper perfectly glues, which in addition to external aesthetics is also durable. Hence, puttying is an obligatory stage of repair work, the absence of which will drastically affect the result of wallpapering. Often a logical question arises: what kind of putty is better for wallpaper walls?
Do I need to putty the walls under the wallpaper
This must be done for several reasons:
- Plastered walls have many defects that will be visible when wallpapering. Especially they can stand out when they glue striped wallpaper or thin, light tones.
- After plastering, the walls may have cracks when drying. They must be repaired. Because the reasons for the appearance of this deficiency are unknown, they expand due to the movement of the soil; with an improperly made solution, they can remain unchanged.
- After filling, the walls become more protected from external factors.
- Puttying a drywall is necessary because gluing wallpapers onto “bare” drywall is not recommended by the master for many reasons - from losing the appearance of wallpaper to unpleasant surprises when they are removed.
Puttying the surface is carried out in several stages:
- Determination of the roughness of the wall and its preparation.
- Application of the starting mixture.
- Finishing and perfecting the surface.
With proper puttying, the surface will be ready for wallpapering.
How to choose the best putty for wallpaper
There are several varieties of putty mixtures. They differ not only in brands, but also in characteristics: component base, drying speed, etc. Also, putty can be starting, finishing and universal. The features of each of the varieties will be discussed in the next chapter.
- Gypsum putty
Gypsum putty in the form of a mixture also includes quicklime, which makes it possible to make the surface as white and matt as possible, which is important when gluing light wallpaper. It fills all the cracks and recesses, levels the wall to the ideal state and dries out pretty quickly, creating a solid surface without shrinkage. Ideal for wallpaper in dry rooms heated in the cold season. However, it is undesirable to use it in kitchens, bathrooms and other rooms where there are sources of increased moisture. Experts recommend using gypsum putty both as a starting coating and as a final coating.

- Cement putty
Cement putty in the form of a solution has a coarse-grained structure and a grayish tint. It is moisture resistant, but dries for a very long time and gives significant shrinkage. Another disadvantage is its too coarse texture, poorly polished. But it can be used in humid rooms: kitchens, toilets, showers, bathrooms, as well as in basements and cellars, if the house is located in the countryside. Cement mass is used both for interior and exterior works, but in the second case, of course, we are not talking about wallpaper.

- Polymer putty
Polymer putty is considered an innovative material. It is characterized by elasticity, ease of application and low consumption. Most often made on the basis of acrylic or latex. It is acquired in a ready-to-use form. With its help, it is possible to perfectly level both concrete and drywall surfaces, but it is inferior to the gypsum counterpart in terms of density.

- Acrylic Putty
Basically, acrylic putty is used to prepare walls for finishing painting. Under wallpaper, it is used less often, but can be used both in dry and wet rooms as a starting or finishing coating.
- Latex putty
Latex-based mass is used only at the final stage of work. It provides a smooth, perfectly even glossy surface without a single flaw. Often it is used on the ceilings. But this option is the least common in Russia and the most expensive.

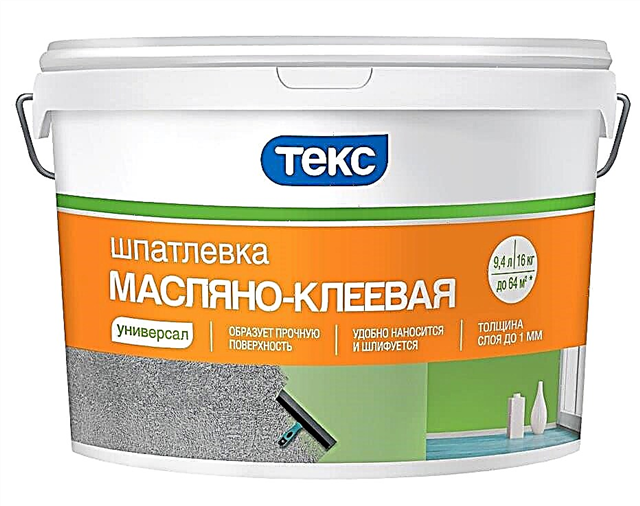
- Glue and oil-glue putty
Glue and oil-glue putty has a high density, so it is difficult to apply to the surface. Only professionals can work with it. The advantage of this mixture is its sufficient drying strength.
- Putty with PVA
Putty with PVA is ideal for wet rooms, as it contains antifungal components.

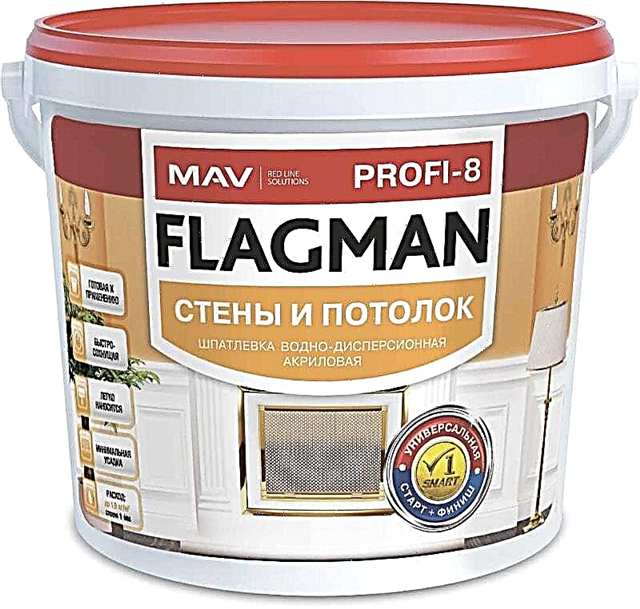
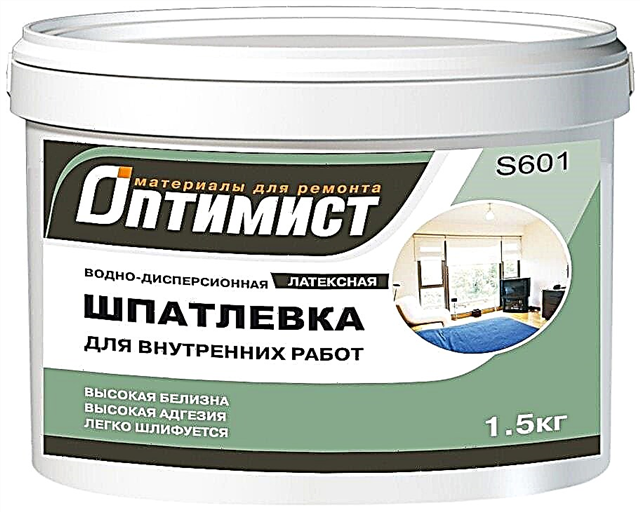
- Water-dispersion putty
Water-dispersion putty has recently become widespread among professional builders. It has a very high performance. According to finishers, this material is easily applied to concrete, fiberboard, brick, wood and other surfaces.
Thus, when choosing a material, it is important to consider the condition of the walls, the humidity level of the room, the possibility of heat exposure and the type of wallpaper. Inexperienced craftsmen are better off starting with plastic putties to make it easier to switch from dry to wet.
With the existing alternative, it is better to use ready-made putty mixtures that fit well on the plaster and retain their properties after drying. They are ideal for beginners, who, due to inexperience, can not always dilute the composition correctly, and can reduce the time of repair work. According to the assurances of sellers of construction stores, ready-made pastes for puttying are in great demand.

At the same time, experts find advantages in using dry (powder) mixtures, from which you need to prepare the solution yourself.
- Firstly, it is believed that it is the dry composition that is used for internal work, and the finished one - for outdoor use.
- Secondly, dry mixes practically do not shrink.
- Thirdly, they are stored for a long time, unlike finished pastes, the shelf life of which is much shorter.
- Fourth, they are much cheaper. But the main difficulty lies in the correct preparation of the solution, which provides a good result of puttying the walls under the wallpaper.
Which is better for deep alignment
Starting putties. With their help, it is possible to eliminate all the errors of plastering, cracks. It is coarse-grained, applied to a surface of up to 20 mm. Putty Knauf HP (starting) - gypsum putty, applied with a layer of 4 mm to 15 mm. The main direction is surface leveling in front of the finish. After kneading, the solution hardens quickly, after 15 minutes the work stops. It does not shrink. Ceresit CT 29 starting - performance of work on a concrete, brick, cement-sand wall. It covers the cracks, the recesses remaining after the plaster.
The maximum applied layer is 20 mm. Unsuitable for work in a room with high humidity. After kneading, the solution can be used for 50 minutes. For complete drying on the surface, 10-15 hours are required. High strength. Kreisel 662 universal - include cement and lime. Apply a thin layer to a surface coated with plaster, as well as without coating. It has high adhesion. Use the mixture in rooms with high humidity. The maximum layer is 3 mm., There is shrinkage. When cracks are detected, in addition to putty, a reinforcing tape should be used. She will not let the crack become larger ..
What putty under the wallpaper to choose?
The choice of putty for wallpaper on the modern construction market is simply huge! Below we have given several options with characteristics and approximate prices.
- Universal polymer putty Sheetrock (1300 rub./28 kg).It features flawless whiteness and good adhesion with any base.
- Universal plaster putty KNAUF Fugen (462 rub. / 25 kg). Due to environmental safety it can be used in children's rooms. It is applied with a layer of 1.5 cm. Too hardening is considered its drawback.
- Finishing gypsum putty KNAUF Rotband Finish (400 rub. / 25 kg).It guarantees a solid base, no shrinkage, easy dismantling of wallpaper during subsequent repairs.
- Finishing polymer putty Weber Vetonit LR + white (430 rubles / 20 kg). A great option for wet rooms. It is applied in a layer 1-5 mm thick manually or mechanically. It lies flat on the walls, is well polished. The period of complete solidification is 48 hours.
- Finishing polymer putty Kestonit LH (1300 rub./20 kg).It has an ideal whiteness, provides a solid base in rooms of any humidity level, is used sparingly, but gives a small drawdown.
- Finishing putty Prospectors (255 rub. / 20 kg). Contains gypsum and additives. Designed for use in wet rooms. Differs in plasticity, dries quickly, does not shrink, but does not provide high surface strength after drying.
- Finishing putty Sheetrock Superfinish (1250 rub. / 17 L). It has high ductility due to the vinyl additives included in the composition. Has a shrink. It is applied with a layer of 2 mm. The drying period is 5 hours, however, experts recommend starting subsequent work only after a day.
- Plaster putty 2 in 1 (start-finish) Acryl-Putz (250 rub. / 15 kg). It dries very quickly, does not shrink, but can only be used in dry rooms.
- Starting plaster putty Volma-Standard (268 rub. / 20 kg).In addition to gypsum, it contains mineral components. It provides a strong, smooth surface, but it seizes very quickly, which is a drawback in work.
- Draft gypsum putty Osnovit-Ekonsilk (383 rub. / 20 kg).Suitable for damp rooms. It has good ductility, does not shrink. It is applied with a layer of not more than 1 mm, otherwise cracks may form on the surface.
Wall putty technology for wallpaper
Puttying walls for wallpaper is carried out in three stages. Subject to technological standards, the surface will be completely ready for the final finish. The putty layers will not peel off, and the glued wallpaper will not peel off.
- The surface condition is visually determined, it is prepared for the application of putty.
- A rough (starting) mixture with a layer thickness of 3-5 mm is applied on top of the plaster. All microscopic cracks and other surface defects are filled with the composition, small irregularities are leveled.
- A durable finishing white coating with a thickness of 1.5-2 mm is applied, and the wall is brought to a perfect condition. As a finish, latex or acrylic putty is usually used.
Attention! In the absence of noticeable defects on the walls, universal putty can be applied. Its use will save time and money.
When using correctly selected high quality materials and observing the characteristics of the technological process, the putty wall will be completely ready for wallpapering.
Useful Tips
A few useful tips that will help to properly putty the walls under the wallpaper.
1. For uneven walls, with cracks and other flaws, priming must be added to the putty process. First, the starting putty is applied, then the primer, then the finishing putty, and finally the last coat of primer.

2. In the process of puttying surfaces it is not recommended to take long breaks. The transition from one wall to another should not take more than five minutes.
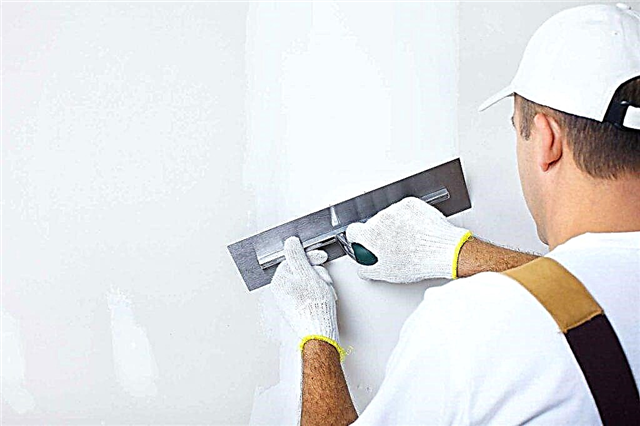
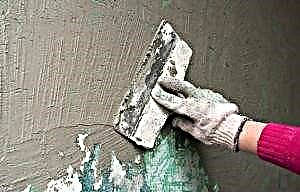
3. Putty is scooped out of the container with a small spatula. Then a wide spatula is leaned against the wall at an angle of 90 ° and a mixture is thrown on it. After that, a layer of the required thickness is smeared on the surface.
4. Putty on the walls must be from the corner, and then move horizontally.
Conclusion Do not be afraid to perform putty work, even if you are doing the repair for the first time. The main thing is to choose the right material and strictly follow the instructions. At the stage of puttying before the solidification of the mass, any flaws can be fixed.
Putty for wallpaper
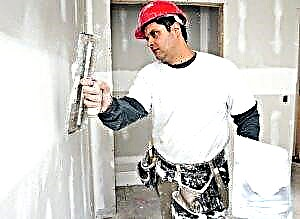
 Before you start wallpapering, you need to prepare the walls.
Putty under the wallpaper is applied only after the completion of all work on plastering the walls.
Drywall is called dry plaster, this base should also be puttied and prepared for gluing.
Types of finished putty for walls: which is better
 A well-puttied surface is the result of the final work of the master and an indicator of the materials used.
Ready putty mixtures can reduce the time for the master kneading putty.
The most used types of finished putties:
- Latex acrylic - apply to any surface, including drywall. Its most widespread use is for surface finish. The elastic solution allows you to make a putty layer of 1-3 mm.
- Oil-glue and glue - has a high density, so professionals work with it. It is hard to apply to the surface, but when dried has a certain strength.
- Putty with PVA. It has antifungal components, therefore it is applicable in wet rooms.
Starting: the best choice
 In addition to ready-made mixtures, dry putty solutions are also sold on the market.
Starting putty is applied to prepared plastered walls.
The most commonly used are putties:
- cement mortars
- gypsum mixtures,
- polymer putties.
Cement putty is used in a damp room. It is coarse-grained, with a gray tint.
Plaster mixes - use in the dry room which is heated in the winter. It incorporates quicklime.
Polymer - used both in wet and dry rooms. It has high elasticity.
Starting putty manufacturers:
- Knauf starter putty is intended for indoor use. It has a gypsum base. Due to its environmentally friendly composition, the mixture is used in children's rooms. The minus of putty is considered to be quick hardening. The maximum layer of the applied solution is 1.5 cm.
- Volma Standard. Consists of gypsum and mineral compounds. After puttying, you can start gluing. The surface is smooth and durable. The downside is quick set.
- Founders-Eksilk - gypsum base. Designed for dry rooms. Plastic, has no shrinkage. The thickness of the applied layer is 1 mm, if more, then cracks appear upon drying.
Observing the correct preparation of the mortar, puttying the wall will have a good result.
Finish: how to choose by rating the best
 After drying the starting putty and carrying out the work, apply the finishing mixture. The most popular are:
- Prospectors - Finish. The composition includes gypsum and additives. Apply in rooms with high humidity. Non-shrink, plastic, quick-drying. Minus - low surface strength after drying.
- WEBER LR +. The applied layer is 1-5 mm. working solution does not solidify within 2 days. After drying, an even smooth white surface is obtained. Putty is applied both manually and mechanically.
- Sheetrock Superfinish - vinyl additives are a part, therefore putty has high plasticity. A 2 mm layer dries after 5 hours. However, all subsequent work by the master is recommended to be carried out one day after application. Has a shrink.
What to choose a good coarse-grained
Coarse putty is needed for the initial processing of the wall after plastering. The most popular are:
- Unis Glare - natural materials included. Do not use in rooms with high humidity. To putty the surface using a reinforcing mesh. No shrinkage. It has plasticity, after drying there are no cracks,
- Vgt acrylic universal - based on acrylic. Layer thickness 1-7 mm. It has a slight shrinkage, good adhesion.
Coarse putties are all types of cement-based mixtures.
What putty to choose for drywall
The drywall surface is treated several times. Initially, putty is used for joints along with reinforced tape. The second step is the coating of the starting putty.
 The next step is to cover the surface with a finishing putty. Only after complete drying of one layer, it is necessary to proceed to the following work.
Under the wallpaper, the drywall surface is covered with putty layers for greater strength of the entire structure.
For a neat appearance, since if thin wallpaper is glued to the sheets without processing, the color of the wall will appear on the wallpaper.
How to putty wooden surfaces before wallpapering
Puttying a wooden surface is different from concrete, brick. There are factors that influence the choice of putty mixture for wood:
- high adhesion - the life of the putty under the wallpaper depends on it
- the solution must be flexible
- drying speed.
Applicable types of mortar for wood surfaces:
- Gypsum-based mixture.
- Latex putty.
- A mixture with the addition of acrylic.
- Oil mixture.
- Putty with PVA.
What putty is better to putty unprocessed concrete
 The concrete wall basically does not have large differences in the plane. Therefore, having skipped plastering, they immediately begin to putty with the starting compound.
The basecoat consists of several layers. Moreover, the second layer is applied only after the first has completely dried. For coating, mix cement compositions. They have shrinkage, so the layer should not be thick.
The finish should be thin. It is difficult to hide the gray color of the starting material under it, however, a thin layer makes the surface smooth, ready for wallpapering.
Universal putties are also used. But, apply them with a thin layer 2 times. They are plastic, do not have shrinkage. If the walls are even, the differences are 2-5 mm, then the use of mixtures is permissible.
How many layers should be applied to concrete bare walls
On a concrete almost flat surface, 1 layer of starting putty is applied. The layer thickness does not exceed 15 mm. Beginners need to use a perforated lighthouse profile to align the wall. It is fixed on the mixture, level is regulated by the level. Work begins only after complete drying of the solution under the profile.
Attention. If there are wooden slats, they are used as beacons. But, the rail should not be high and with notches, otherwise there will be a ribbed surface.
What technologies exist
 Wizards apply 4 methods that are suitable for beginners to work with:
- The mechanical method of applying the solution.
- Semi-mechanical - application of the mixture, and then its alignment with a spatula.
- Lighthouse - used for starting putty.
For the mechanical method, a machine spraying putty with a thin layer is applicable. After applying the layer, it is necessary to level the plane with a spatula with a wide spatula.
Semi-mechanical - the machine throws large drops on the wall, which must be stretched evenly across the wall.
Lighthouse is applicable for starting plastering. Suitable for beginners. The use of beacon profiles will accelerate and facilitate the work.
How beginners without experience correctly puttying walls with their own hands: a step-by-step guide
Novice masters need to know the nuances and the correctness of the work.
Phase preparation of the solution, applying the material to the surface includes:
- to prepare the solution, you must carefully read the instructions and know exactly how much water is needed for mixing,
- the starting solution is applied to the surface horizontally and vertically. To avoid tubercles, do not apply the solution from the floor itself. He catches trash. Angle - here it is necessary to go with a spatula perpendicular to the corner, horizontally to the floor. So there will be no “washboard”,
- for productive work, the solution is prepared in small portions. When working out, he will not have time to freeze,
- the finishing layer is applied to the primed surface with a 2 mm layer,
- when filling the tool must be kept at an angle of 30 degrees,
- after applying the mortar to the walls, putty the corner with a corner spatula.
After all the recommendations, leveling the surface under the wallpaper will not be difficult even for the person who first started this business.
Surface preparation
 In order for the surface to be perfectly flat, smooth, you need to prepare the surface. This process consists of several steps:
- Cleaning the walls of dust, excess pebbles, frozen drops of plaster. For cleaning use mechanical means - grinding machines, brushes, spatulas.
- Primer surface. This must be done for degreasing, as well as almost all primers contain antiseptic agents that protect the surface from mold.
After processing the wall, proceed to subsequent work.
Choosing the right tool
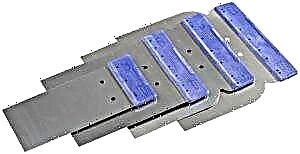 For proper puttying with your own hands you need to have a tool:
- construction mixer
- set of spatulas - wide spatula, small, angled,
- brush, primer,
- the rule for creating a flat wall is 2 meters,
- level to control the evenness of the wall,
- sandpaper to wipe the surface,
- Skinner,
- container for the mixture.
How to beginner putty uneven surfaces with starting putty
To apply the starting mixture to a dry clean wall, beginners are recommended to use metal beacon profiles. They are installed along the wall so that from one profile to another the maximum distance is 1.5 meters.
Lighthouses put on putty paws. Evenness is inferred by level. Excess creeping out solution is removed. The mixture must dry completely before starting work.
The putty is put on the wall with your legs and stretched over the surface without getting out of the installed beacons. Flatness of the surface is formed by the rule. With its help, the solution is tightened, the excess is removed from the tool. If necessary, apply a second layer of solution.
If the putty has a shrink, then 20 minutes after application it must be tightened with a rule.
How many times the mixture is applied before solidification
 The starting mixture is applied in a layer of 20 mm.
If you need to level the wall with a large layer, then a second layer is applied.
But, this happens in rare cases, because after plastering, the roughness is on average up to 1 cm.
Filling of bare walls is carried out if the roughness is 2 cm. The plaster layer is applied once, it may be overlapped.
How and what is better to check the readiness of the surface for the subsequent stages of work
After filling the wall, the work must be left for a while. It all depends on the composition. Cement mortars shrink: after 20 minutes, the treated wall must be tightened with the rule. After passing 1 hour, you need to hold your palm over the surface, it should give a “milk”, while the solution is already hardened. This milk is carefully removed with a spatula. Do the panning. The cement mortar hardens for about a day. Checking is a palm, the solution should not stick.
Gypsum and polymer mixtures do not shrink. After application, do not touch them for at least 10 hours. After that, a dry palm should hold op surface. It should be dry, smooth. If damp or sticking is felt, then the surface is left for a while.
Is a primer necessary for finishing putty: which one to use
 All primers differ in their composition and purpose. Primer mixes must be applied before finishing putty for reasons:
- the primer increases the adhesion of the applied materials. That is, the top coating will better lie on the primed surface,
- if after drying the starting mixture a spider line of microcracks appeared on the surface, the primer clogs them, preventing moisture from penetrating there,
- the primer creates a thin film on the plane, protection against absorption of moisture and the components of the finish layer in the starting layer. Due to this, the finishing solution lays evenly. Material consumption is reduced.
The compatibility of the primer with putty is indicated in the table:
How to apply the finish yourself and putty properly
For the correct application of the material to the surface, the principle must be followed - the application of the material from dry to wet. It is necessary to retreat from the ceiling by 30-40 cm and apply a layer of mortar. Putty is applied from the ceiling by vertical movements.
Putty is best applied under side light. To do this, use a diode lamp or spotlight. Uncertain motion with a putty knife and too thick putty leave a ribbed mark on the surface, noticeable in the light of a lamp.
Vertical movements with a spatula near the corners are not allowed. The tool touches an adjacent wall - a “washboard” appears. The tool is lead from the corner to the opposite wall.
What to do after finishing putty: grout
 After the walls have dried, they are sanded - overwritten.
To work, you need:
- paint block,
- respirator,
- diode lamp
- diamond mesh or sandpaper.
There are 2 ways to sand the walls:
- Grouting the walls with a diamond mesh or sandpaper (quickly clogging) under the wallpaper.
- Grout under the lamp with a fine-grained sandpaper.
In the first method, a bar is used, on which a mesh of fraction 300-400 is used. There are bumps on the wall that are invisible without a lamp. It is necessary to put on a mask and pass in circular motions along the entire wall. From time to time use a vacuum cleaner to collect dust on the floor.
In the second case, the lamp is installed on the side so that the light goes along the wall. Then you can see all the shortcomings after the finish layer. A grid with a fine fraction of 600 and above is put on a bar. Starting from the corner look over the wall. For all small grooves, tubercles, stripes, grouting is carried out in circular motions.
The second method is applicable for surfaces for painting, for gluing thin wallpapers that repeat the structure of the surface.
When can I start pasting
 After sanding the surface with a brush, use a dry cloth to clean the walls of dust. This is done with a vacuum cleaner at first speed. After cleaning the wall, it must be covered with a primer. After drying, it will leave a thin film that will protect the absorption of glue into the surface.
When the primer is completely dry, begin to work with wallpaper.
Having studied all the subtleties of the choice of putty, the surface will be perfectly smooth, durable. Do not miss out on the work of small nuances, they play an important role in the formation of a solid wall for wallpaper.
Walls with putty and wallpaper have an attractive appearance, a long warranty period.
Types of putty mixtures
The question of which putty to choose for the walls for the wallpaper must be decided in advance, because the choice in the building materials market is very diverse and it is difficult for an amateur to decide which mixture is better.
It should be borne in mind that the wall surface on which the wallpaper will be glued needs a fairly smooth one.
In construction stores, the choice is very wide, many types of putty are presented, differing in composition. Therefore, it is better to navigate which one to choose. Some mixtures are capable of absorbing moisture, which can negatively affect the decorative coating of wallpaper. It should be noted that oil-glue mixtures containing drying oil in this situation are categorically not suitable.
The following mixtures are distinguished, which make the walls putty with their own hands under the wallpaper:
- Polymer blends (based on acrylic). This also includes latex putties, they have several advantages: ease of application on the wall, the ability to grind, good protective properties, strengthen the wall and do not allow moisture to pass through.
- Water-dispersed mixtures. Widely used during finishing and puttying, with their help a high-quality and durable layer is created on the surface. Such compositions are sold ready-made (viscous mass in buckets), however, after drying, they often give a slight shrinkage.
- Cement-gypsum putties. They are the most widely used in interior and exterior decoration work to create a sufficiently durable wall covering. Some analogues of these mixtures have increased moisture resistance, are easy to use and therefore recommended for non-professionals. They are sold in powder, to prepare the solution, it remains to add water in the specified amount and mix thoroughly.
Selection recommendations
For high-quality preparation of the room and when deciding what kind of putty to putty on the walls for wallpaper, the choice of cement-gypsum mixture is ideal. It does not require additional processing of the wall and is not able to react with wallpaper glue, because it is also mixed with water.
Necessary materials to putty on the walls with your own hands:
- 2 types of mixture: starting (basic) and finishing putties,
- primer with additives against bacteria and fungi,
- to putty drywall, you will additionally need a mesh-sickle tape to overwrite the joints.

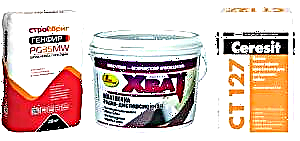
The most popular brands of putty mixtures, from which it is better to choose:
- Knauf - products are used to close joints between gypsum plasterboards.
- Concrete - better suited for walls as wallpaper, but not for painting.
- Eunice Kron - this putty is used as a finish, it has an increased whiteness of color, but it is not suitable for lay people, as it involves difficulties in puttying.
- Prospector and Hercules are mixtures of Russian production, which are better to putty on walls in rooms with high humidity.
- Bolars - superfinishing putty, the applied layer should be less than 2 mm.

On the video: how to choose putty for walls and ceilings.
Necessary tools
Before starting work on leveling the walls, you should find out what tools you need:
- spatulas of several sizes: wide (40-50 cm) and small, as well as a corner option,
- a drill with a special nozzle for preparing a putty mixture,
- brushes and rollers for priming walls,
- metal rule for leveling the starting layer,
- building level - helps to control the correct vertical walls,
- sandpaper or mesh for grouting transitions and tubercles,
- containers or buckets for mixing the solution.

Preparatory work
Preparation of the surface and materials must be done before applying putty, especially in a situation where repairs are done in an old apartment:
- It is necessary to inspect the walls and free them from previous coatings (residues of wallpaper, pieces of plaster or paint).
- To clean the surface of dust and dirt with a broom, rag or vacuum cleaner - this is done just before you putty the walls under the wallpaper.
- When a lot of drops, cracks, holes or chips are found on the wall, they must first be coated with a cement-sand mixture or polymer putty.
- Apply a primer to the surface with a roller for better adhesion between materials. This is especially important in the corners of a room where mold spots are more likely to occur.
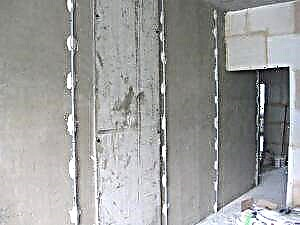
- The technology of filling walls from gypsum boards is as follows: the joints between the sheets of drywall need to be glued with a grid, and then the starting solution is applied from above, the cavities and caps of the fasteners are covered with it, otherwise the traces of them with brown spots will appear through the wallpaper.
- Putty of concrete walls under the wallpaper is mandatory, since such a surface has defects, only wide cracks and chips should be covered with cement mortar. If the concrete walls have a deviation from the vertical, it is necessary to apply a leveling layer of plaster using beacons.

It is important to knead the right amount of putty solution, given that the dry mix preparation time is no more than 10 minutes.
Typically, a bag of mix (25 kg) requires 9-10 liters of warm water. However, the solution is best done in parts, especially when using a gypsum mixture that quickly hardens.

Beacon Application
The walls in the room must be inspected before starting work: if they are very uneven, have large cracks, hollows or tubercles, are deviated from the vertical or differ in thickness, then a large amount of work will be required to level and fill the walls.
We will tell you about one of the effective and proven methods of how to properly putty the walls under the wallpaper in a similar situation. It consists in the use of beacons - metal rails that help to set verticals on the wall. This allows you to make a perfectly aligned wall in both directions, which is checked by the level.
Lighthouses are easy to use: they are attached to the wall with a gypsum mixture, and then they are aligned using the metal rule.
Putty steps
Putty is applied to the wall to seal small and large irregularities, surface flaws, allowing you to level it and create a smoother base on which you can easily paste the wallpaper. Even with plasterboard sheets, it is absolutely necessary to gradually putty the walls.
The process of filling the walls under the wallpaper is as follows:
- A base layer of 3-5 mm thickness is applied and all cracks are filled, which is done to align the walls.
- Then comes the finish layer, which allows you to prepare a smooth surface for subsequent sticker wallpaper. The layer thickness is already less - up to 2 mm.
Puttying the walls under the wallpaper with your own hands also involves priming. A special composition is applied to the prepared (cleaned from the old finish) wall. The primer improves the adhesion of the putty mixture to the surface, which guarantees the reliability and durability of the coating.
Starting putty
Basic or starting puttying of the walls under the wallpaper with your own hands involves applying a thick layer of the mixture. This in turn allows you to hide significant differences (up to 2 cm). The technology of puttying the walls includes several stages, so it is important to do everything step by step:
1. Using a small spatula, putty mixture should be transferred to a wide tool, and then, moving from the corner of the room, apply with an even thin layer and distribute the mass over the wall surface.
2. To improve the quality of the putty, it is recommended to use a coarse-clad masking grid, which allows the solution to be distributed evenly. It is fixed on the surface, and smears of the mixture are superimposed on top of it.

3. Subsequent layers are applied at 6-8 cm overlap, each is aligned using a metal rule. The thickness of the layer depends on the number of bumps and defects on the wall (sometimes up to 1.5 cm).

4. The next step is to mash the still wet coating with a hand grater or grinder, then let it dry.

5. An already worn wall is checked with illumination or with the help of a building level for the presence of recesses: if they reach 2-3 mm, then the next layer should be done.

How many times to putty the surface and how many layers of putty will need to be done depends on the depth and number of bulges and depressions on the wall, and each layer must be ironed with a trowel.
Finishing putty
After the preliminary starting stage of work is completed, a finishing putty is made under the wallpaper. It is performed by special finishing mixtures, allowing you to give the surface the necessary smoothness, eliminating all the smallest cracks. Such a mixture is used at the final stage, when all the walls are already plastered and leveled.
One of the important indicators of finishing solutions is their light, sometimes snow-white, color and uniformity.

Finishing putty must be applied with a thin layer (1.5-2 mm), sometimes it is required to make two layers. Experienced experts recommend doing the finishing stage using a special backlight located on several sides, which will allow you to notice and correct the smallest defects.

The finishing layer of the putty of the walls under the wallpaper must be wiped, but with the help of fine-grained emery. Next, you should wait for the natural drying of the entire wall. The final stage is the coating of the surface with 1-2 layers of primer. Wallpapering can be done after the walls have completely dried.
Purpose of work
Why puttying the walls before gluing the wallpaper? It solves 2 main tasks:
- Surface alignment. Wallpaper is a thin finishing material that fits snugly against the wall; after sticking it, bumps and defects can be seen. Putty allows you to almost perfectly level the surface.
- Improved adhesion. The putty layer creates the basis with which the wallpaper is firmly bonded. To achieve this, it is important to choose the right putty composition, given the type of wallpaper. The plaster has a greater granularity in comparison with the putty, and therefore the adhesion of the lining to it is much worse.
In some cases (for example, drywall walls), it is generally impossible to do without putty. The moistened top layer of drywall will simply peel off the base along with the wallpaper. Putty creates a damping layer, which allows for finishing in normal mode.
The choice of putty
Puttying the walls under the wallpaper with your own hands is carried out in several stages. Accordingly, putty material is divided into 2 main categories:
- Starting (or basic) putty. It is applied with a sufficiently thick layer, this immediately reduces the grain requirement. The purpose of its overlay is to eliminate defects and rough alignment.
- Finishing putty. Made to level the surface to perfect condition. The material is applied in a thin layer, and therefore has a fine-grained structure. It should have high elasticity and provide adhesion to wallpaper adhesive.
The main criteria for choosing putty are the following:
- Water resistance. There are different mixes for dry rooms (letter designation –KR) and for rooms with high humidity (LR).
- Grain structure. Coarse-grained or coarse-relief (basic), fine-grained or fine-grained (finishing) compositions are distinguished, universal with a medium-grained structure.
- The chemical basis. It may have an acrylic, latex, PVA or glue-oil composition.
- Astringent base. Cement, gypsum and polymer compositions stand out.
The specified parameters determine the purpose of the putty - leveling, topcoat, special or universal application. They have various technical characteristics - elasticity, hardening time, strength, etc.
The choice of mixture depends on the wall material and type of wallpaper, as well as operating conditions.
Specificity
What putty to choose for walls for wallpaper? Both types differ in their composition. Given the main ingredients, the following main types are distinguished:
- Oil and glue. This is one of the most famous varieties that is easy to make with your own hands. The simplest option is a mixture of drying oil, casein glue and chalk or alabaster. In finished form, it is sold in a pasty state. Putty of the Nova brand is popular. The mixture is suitable for concrete,stone and wooden surfaces. Drying time is about 22-25 hours. The main advantages are low cost, environmental friendliness. Minus - not suitable for all types of wallpaper adhesives.
- Gypsum - a mixture of gypsum with various fillers and additives. It is widely used as a basic putty for brick walls, drywall. The main advantages are quick hardening, no shrinkage, white color, low cost. The main disadvantage is the low water resistance. Of the ready-made mixtures, Rotband putty (manufacturer Knauf, Germany) is popular.
- Cement. Its basis is cement, this provides a high level of water resistance. The main purpose is the basic coating of concrete surfaces. Widely used ready-made starting mixture Volma. Bergauf produces Finish Zement putty, which can be used for the final leveling of walls.
- Water-dispersion putty. It can be applied to concrete, wooden, brick walls, as well as drywall and fiberboard.
- Acrylic It belongs to the universal category, i.e. it can be used for both basic and finish leveling. It features good water resistance and elasticity. A popular representative is Bravo putty.
- Polymer putty. This is a modern material that allows you to provide an almost perfect surface for any wallpaper. This putty is produced by many well-known companies, in particular Gypsopolymer (Belaton LR), Knauf (Rotband Finish), Pufas.
To the question of which putty is better for wallpaper walls,unequivocally difficult to answer. It is important when buying to avoid acquiring a fake. A branded product is characterized by quality, such a material will hold well on the wall. Counterfeits with unknown fillers cannot be distinguished by this. When choosing, first of all, the category of the room is taken into account. For the kitchen, bathrooms, bathroom waterproof putty is required. The most popular are modern polymer blends with universal use. However, most often the choice of material is a balance of technical parameters and cost.
First stage
The preparatory phase includes work such as removing old coatings and dirt, mechanically removing defects and priming the surface. The following requirements are imposed on the wall under roll wallpaper:
- Strict verticality, which is checked using the building level.
- Evenness. Permissible surface curvature is 1-1.5 mm per meter of wall. The presence of irregularities is detected by applying a rule 1.5-2 m long to the surface.
- The strength of the surface layer. It should not exfoliate when gluing wallpaper, including when impregnated with water or glue.
- Dry surface.
During the preparatory work, all these requirements must be satisfied. First of all, the old wallpaper or paint layer, as well as weak areas of the plaster (peeling, cracking, swelling) are removed. All cracks are closed. Remove grease stains and treat wall areas susceptible to mold or mildew. These places are carefully cleaned and treated with an antiseptic composition. Most often, a solution of copper sulfate is used.
During measurements it is important to assess the degree of surface roughness. Large bulges should be removed with an emery cloth or emery cloth.
With a significant deviation from the vertical or longitudinal roughness will have to apply plaster.
The preparation of the wall surface by priming is being completed. The composition of deep penetration is selected. It is applied with a paint brush or roller in one go to the entire surface of the wall, without gaps. Before applying the putty, make sure that the wall is well dried out. The drying time of the primer is usually 4-5 hours.
Features of puttying
The putty process is shown in detail in the video..It is divided into several stages - the application of the base layer, finish leveling and grinding of the surface. Specific features differ puttying corners.
After the preparatory work is over, you can begin to impose a starting (base) putty. Depending on how uneven the wall surface is, the thickness of the layer can reach 1.6-2 cm. Starting putty can be applied in one or more steps. It depends on the required thickness. The recommended thickness of one layer is 4-5 mm.
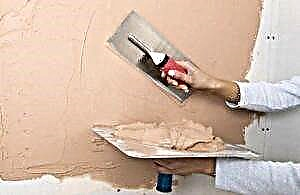
The solution is prepared by thorough mixing using a mixer. It is superimposed with a spatula 60-80 mm wide. When applying the composition, the tool is held at an angle of 35-40 degrees to the wall surface. The pressure should be such that it is uniform over the entire surface. Putty is applied in strips with a slight overlap.
The subsequent layer is done after the previous one is completely dry. If a reinforcing mesh is used, then the first layer is made thin (no more than 2-3 mm), and the mesh is laid on top of it in problem areas. The second layer has an increased thickness, which allows you to close the grid completely and align this place with the rest of the wall surface.
How to putty finish putty? It is applied after hardening of the base solution (preferably, not earlier than in a day). The technology of its application does not differ from the first stage. The only difference is that this layer does not exceed 2-2.5 mm.
Particular attention is paid to puttying corners. The task is simplified by the presence of angular type spatulas that are specifically designed for such work. In their absence, putty can be put in the corner with an ordinary spatula. To do this, he is first applied by the working edge directly to the line of wall junction and is diverted along one wall. Then the tool is again installed in the junction line, but is retracted along an adjacent wall. So the inner corner is finished. In the presence of external angles, a corresponding angular spatula is necessary, since it is difficult for an inexperienced master to ensure its perfect alignment with a conventional tool.
Surface grinding
Even with the best quality putty on the wall surface, traces of a spatula, various risks and grooves spoiling the appearance remain. To eliminate all defects, grout and grind the entire putty surface. Grouting is provided by a moistened, soft cloth. However, this method does not give complete smoothness.
The greatest efficiency provides grinding. It can be carried out manually using an abrasive mesh. Usually, a mesh with the number 80-110 (P80-P110) is used, and with the increase in the number, the grain size of the sandpaper decreases. Work can be facilitated by using an electric grinder.
To carry out polishing, the wall is conditionally divided into zones, each of which is alternately processed. Grinding is provided by smooth, circular movements with a slight pressure. Caution: if pressed excessively, a too large layer of material will be removed, which can significantly reduce the thickness of the putty. It is not necessary to achieve a mirror state of the surface. Small defects will cover the wallpaper strip.
Conclusion
Puttying the walls with your own hands is a rather time-consuming process, but it provides reliable gluing of wallpaper and an ideal appearance. With its help, you can finish any walls, for this you need to choose the right putty mixture. Careful preliminary preparation will help to provide the most attractive appearance of the wallpaper.